Practical Homelab / Solar & Power

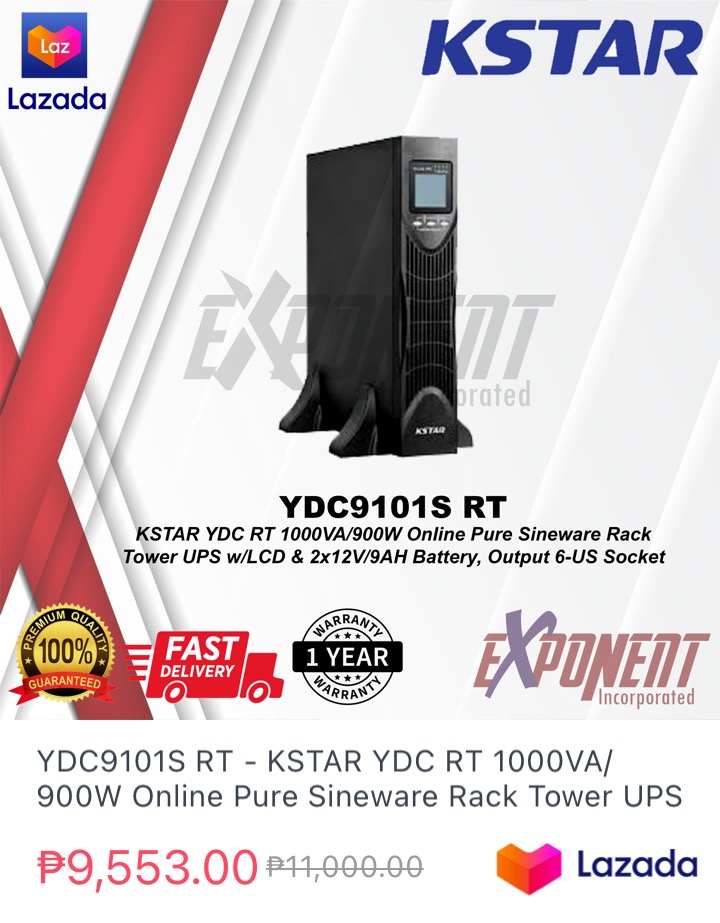
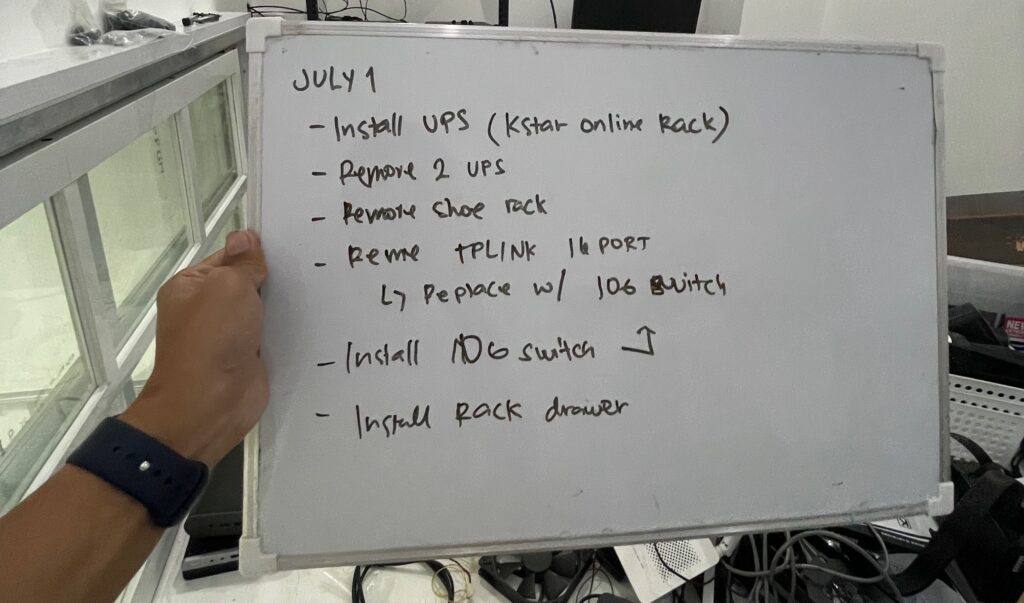
Upgrading UPS Battery

February 25, 2025/Solar & Power/#ups

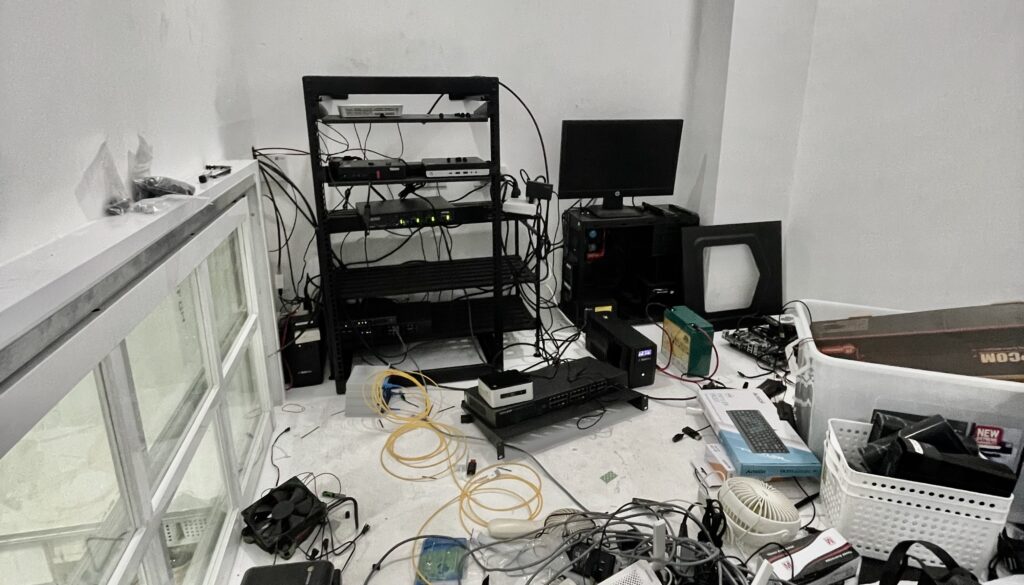
My KSTAR YDC9101S RT UPS battery died a couple of months ago. I’ve been delaying fixing it because I didn’t want a hackish solution since it involves electricity. I also didn’t want to put my servers offline for uncertain amount of time.

The manual says the my UPS battery is not user-serviceable, I was directed to call for a service. I didn’t want to.

I knew that it has to have a battery inside, I just need to figure out how to pull it out. I also didn’t know if I could take off the battery without the UPS shutting down.

How to remove the internal battery

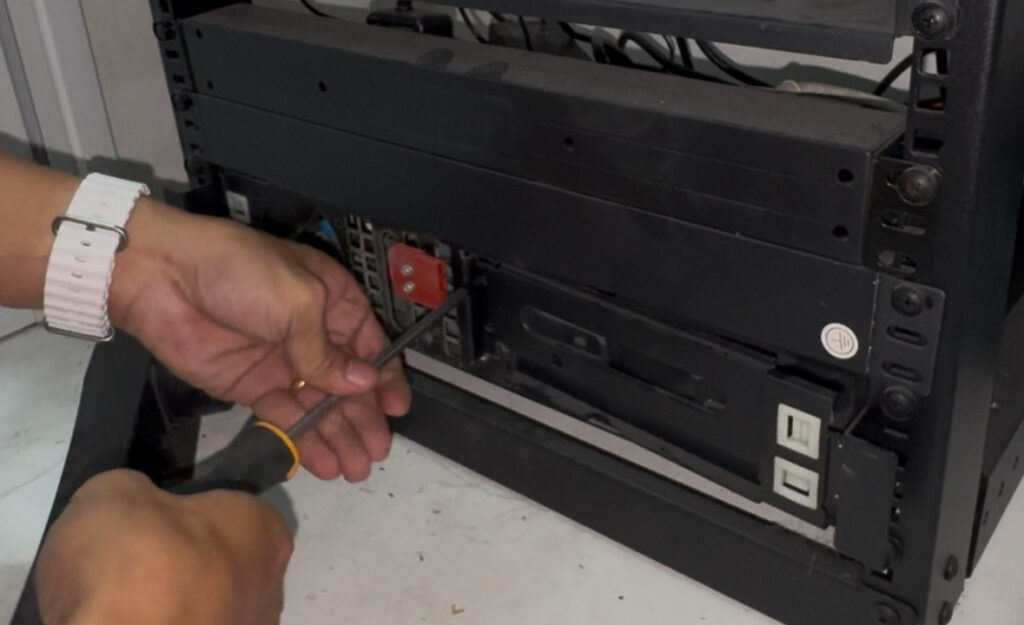
  1. Pull out the front panel
  2. Remove the battery connector
  3. Unscrew the 4 screws and the metal panel will be loose
  4. Pull out the battery

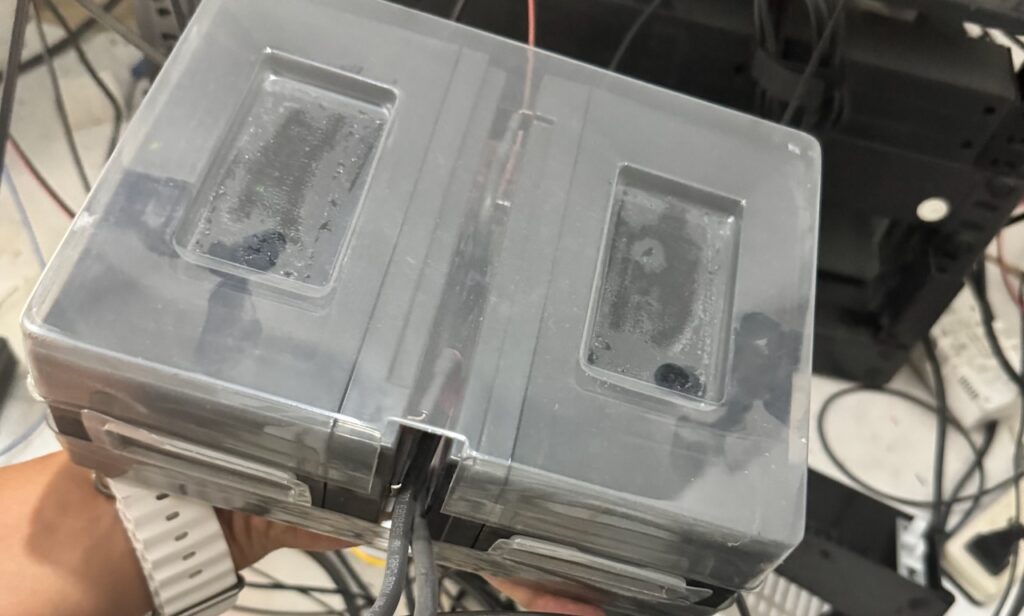
The battery is a lead-acid 12v9ah enclosed in a thick plastic. Connected in a series to make it 24v9ah.

Will the UPS work without battery?

Yes, as long as 1) Bypass mode is enabled in the settings 2) It has already started/working. Start up without battery does not work.

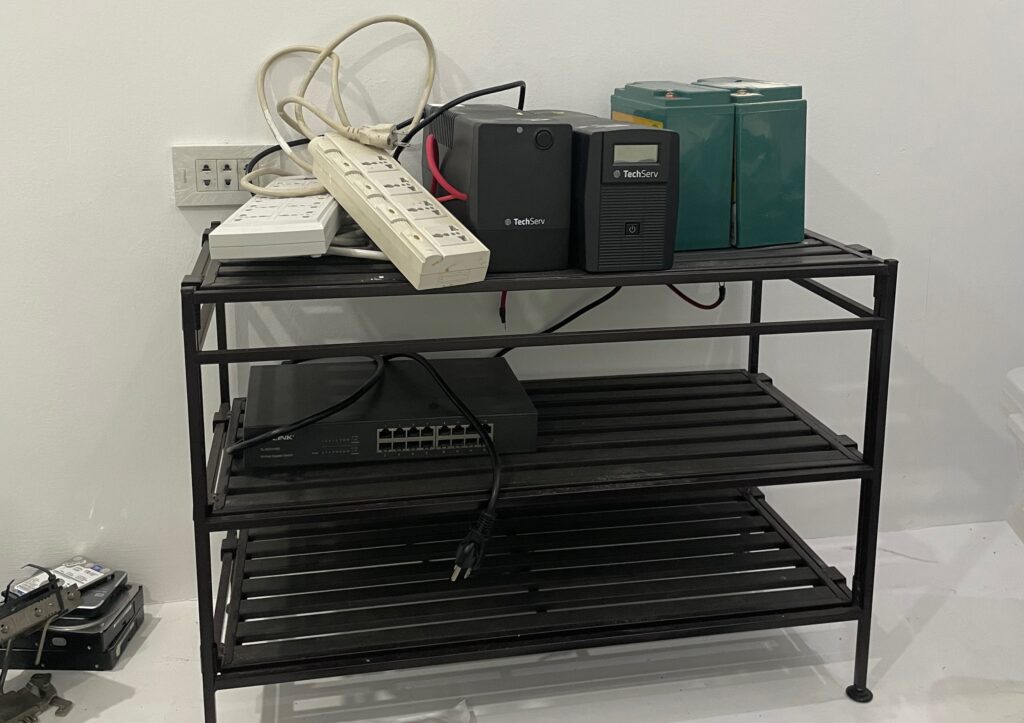
First attempt: Using original battery connector

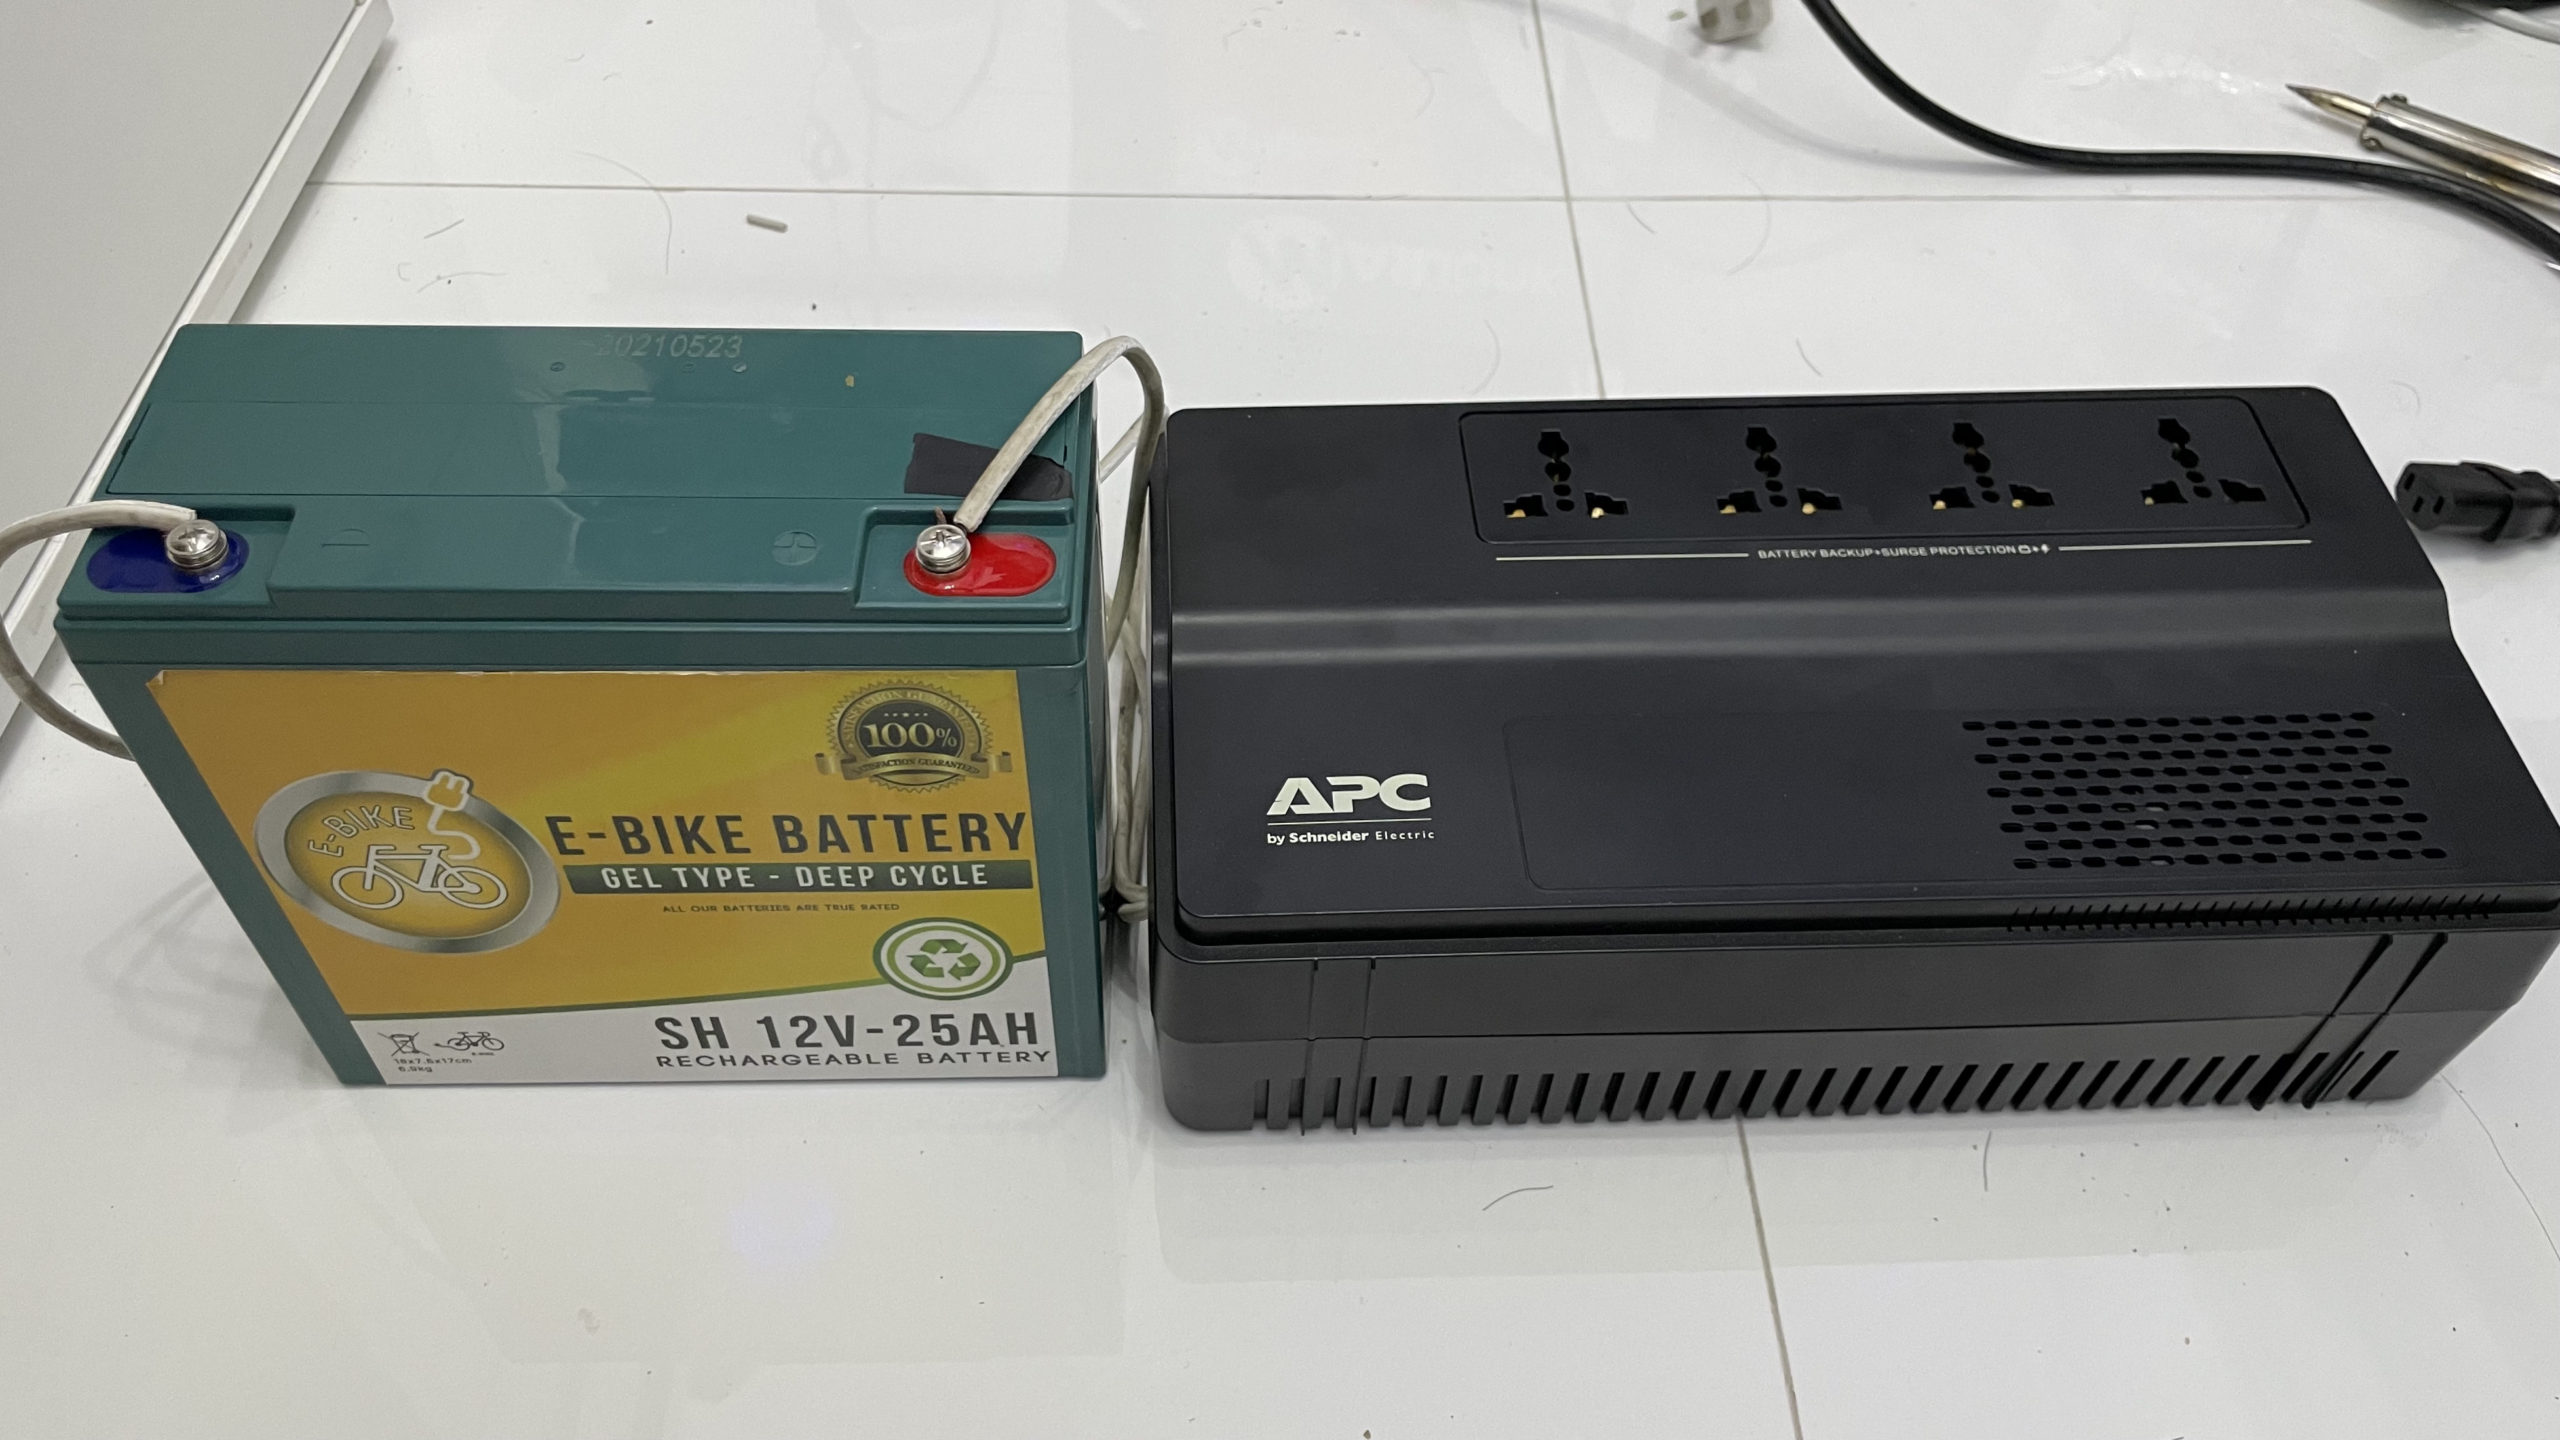
The cost of 12v9ah battery is almost the same as 12v25ah. With 250%+ more capacity, I couldn’t justify buying the lower capacity.

The issue with 12v25ah is the form factor. It does not fit inside the UPS battery container.

What I end up doing is get the battery connector from the original battery and connect it to my new battery outside the unit.

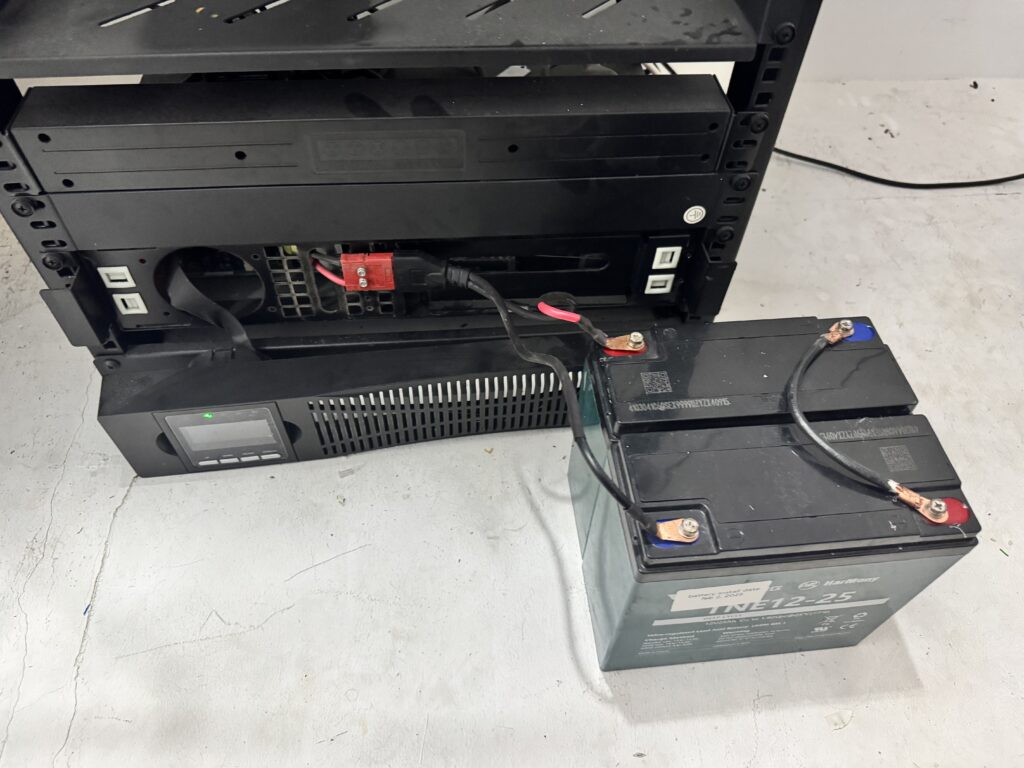
I wasn’t satisfied with this especially the battery connector is in front and I could not close the front panel.

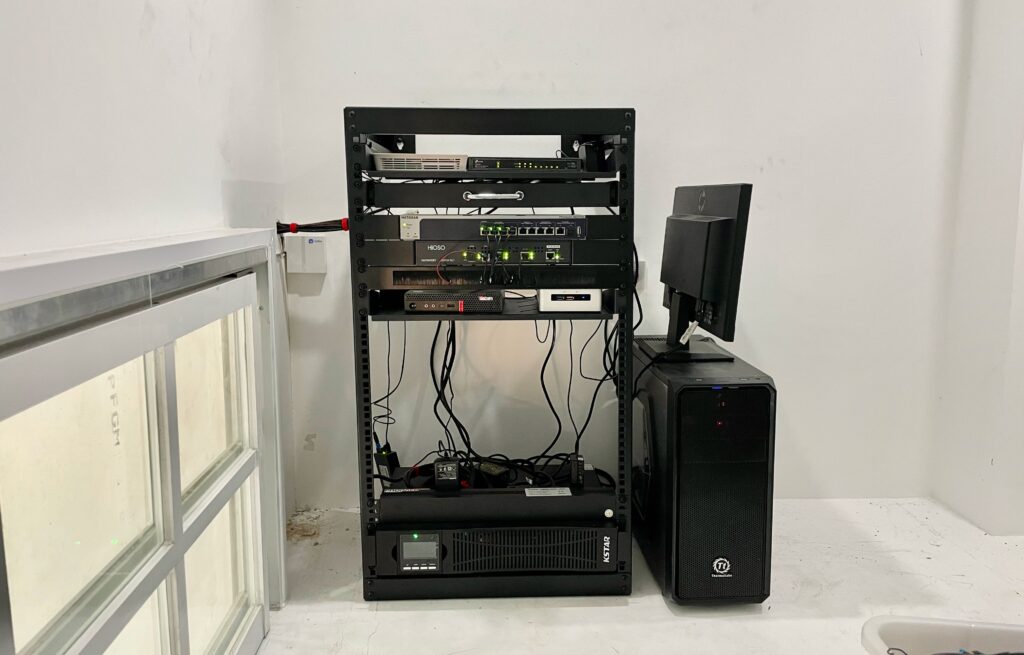
Second attempt: Using External Battery Pack Connector

I read in the manual that this can support an external battery pack. It is also rack mounted and there’s a port at the back to connect it. This also gave me the confidence that it can support bigger capacity batteries.

I’m pretty sure that it’s just a parallel connection to the internal battery. What I did not know and not written in the manual is what type of port it’s using.

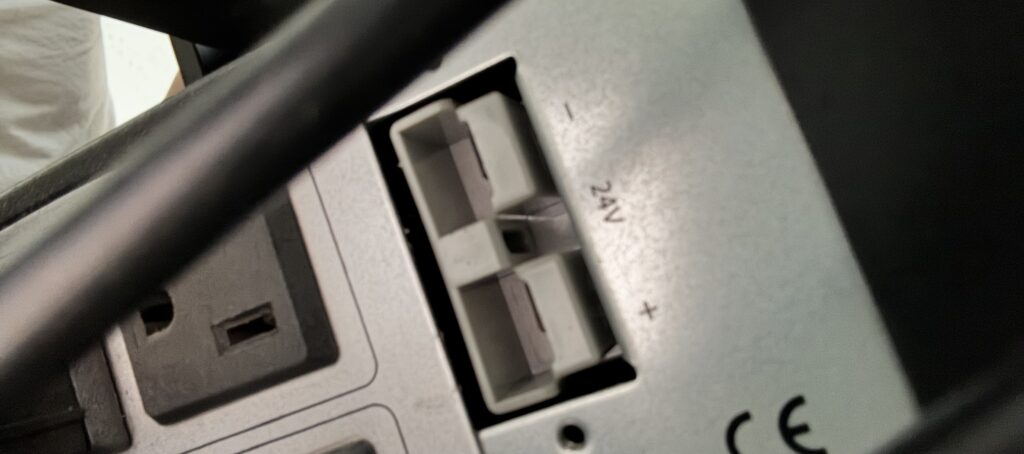
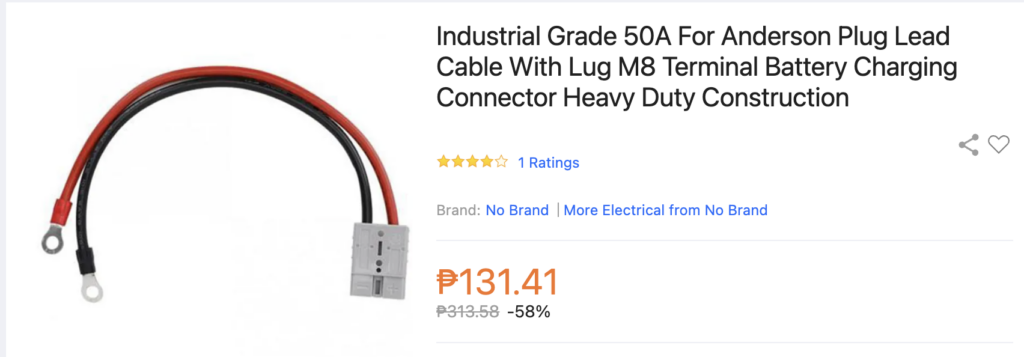
After searching Lazada for all sorts of battery connector, it turns out it’s an Anderson Connector rated at 50a.

I found one that’s pre-terminated with terminal lug at the end.

Now it looks like this
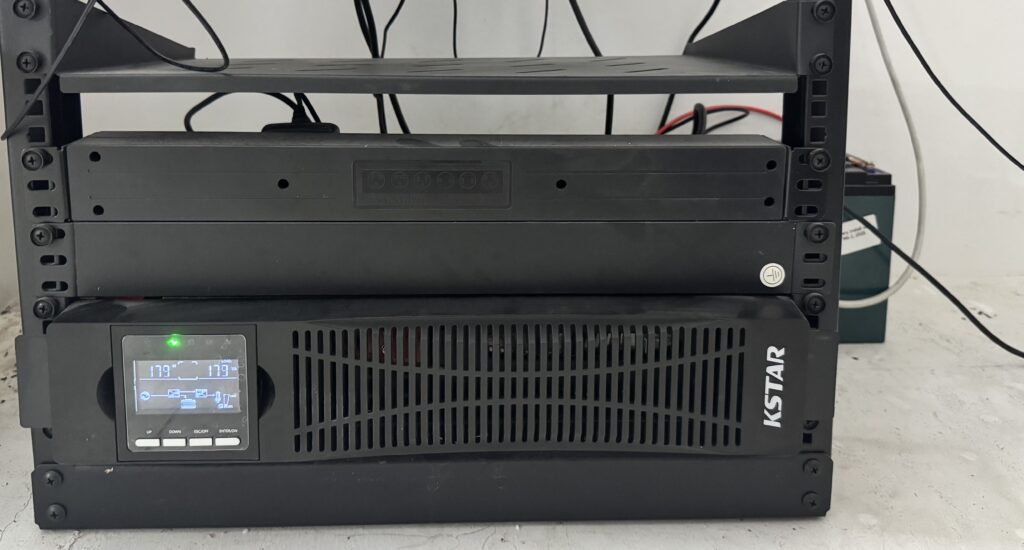
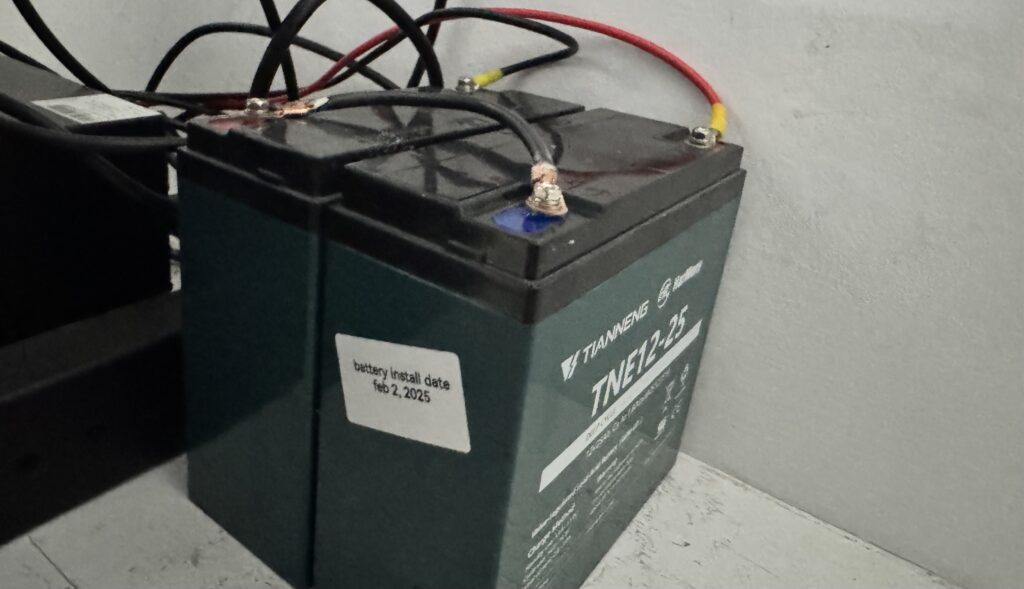
Much better!

I can now confidently setup new servers. Next step: I need a sandbox/staging Proxmox server for all the things I’m looking to experiment to.

Installing an on-line UPS and homelab clean-up

December 13, 2023/Solar & Power/#ups
My homelab’s state before clean up

This was the state of my homelab. Whenever I go at my server room and attempt to arrange things, I get paralyzed how to get started.

Primary blocking reason is how I should handle supplying power. Currently I have 2 separate line-interactive UPS. One for critical internet-related devices, the other for optional servers.

My original plan was to make a DIY UPS using devices for solar. I “thought” it was cheaper. I planned to use:

  • ATS (automatic transfer switch) if I have to have a maintenance, servers will keep running
  • SNAT 1kw inverter - act like a line-interactive UPS
  • Used LifePO4 battery
  • Rack DIN rail for safety devices - ATS, breakers, DIN power plug

I already bought the components but assembling everything was daunting. I had a safety concern mixing high-voltage devices to the same rack as the server. The rack DIN rails would also have exposed live wires and I wasn’t comfortable with the plan. I purchased before I thought through the plan.

I was in a limbo on how to proceed. My homelab has been in this state for more than a year.

Finding a reasonably-priced On-line UPS

I finally found a reasonably priced online UPS. It’s on-line meaning it has double conversion 230v AC -> 24v DC -> 230v AC. Any power fluctuation won’t reach the devices.

It’s KSTAR YDC9101S RT. It’s only 900w as I don’t intend to run anything more than that. It has a user replaceable battery. It can be replaced while plugged-in. And it can be rack-mounted!

Cost is 10k, including shipping. This is cheap as compared to other on-line UPS I checked. Second-hand UPS without battery is easily around 20k. So I bit the bullet and purchased it.

A proper UPS, finally.

Plan of action

I knew I’ll rabbit-hole to something else when I start working on my homelab. There’s always something else to do. What I did was list what I wanted to accomplish for the day and limit myself to 2 hours.

  1. Remove 2 line-interactive UPS
  2. Remove shoe rack
  3. Remove TP-Link 16-port Swtich
  4. Install KSTAR UPS
  5. Install 10GBe Netgear Switch
  6. Install rack drawer

With a clear plan of action, I started.

Removing deprecated stuff

  • Shoe rack - I used this as a poor man’s rack. It become unmanageable quickly
  • 16-port TP Link switch - turns out I don’t use more than 8 ports anymore. With a new 10Gbe switch, it’s more than enough
  • 2 extension cord
  • 2 UPS with modified batteries

Installing new stuff

After clean up
  • KStar On-line UPS (bottom)
  • Netgear 10Gbe Switch
  • Rack sliding cabinet - I felt like I needed this to put loose items such as USB keyboard and mouse, extra SFP modules, rack screws. I had instances where I spent an afternoon looking for those.

Finished everything in 2 hours. Listing out what I want to accomplish was handy. It keep me on-track. I feel good about the progress I made with my homelab.

Network UPS Tools

August 4, 2023/Solar & Power/#ups

My UPS have a serial port to report operating data. I read in the manual that it uses Upsilon 2000 software to get data. It uses the Megatec Protocol which is supported by Network UPS Tool’s blazer_ser driver.

I learned this by running nut-scanner --eaton_serial /dev/ttyUSB0 which tries different protocols to the serial connection.

root@jco-tc-pm01:~# nut-scanner --eaton_serial /dev/ttyUSB0
SNMP library not found. SNMP search disabled.
Neon library not found. XML search disabled.
IPMI library not found. IPMI search disabled.
Scanning serial bus for Eaton devices.
[nutdev1] driver = "blazer_ser" port = "/dev/ttyUSB0"

Plug-in USB to RS232 connector. dmesg should yield something like:

[257226.785044] usb 1-2: new full-speed USB device number 2 using xhci_hcd
[257226.933739] usb 1-2: New USB device found, idVendor=0557, idProduct=2008, bcdDevice= 3.00
[257226.933743] usb 1-2: New USB device strings: Mfr=1, Product=2, SerialNumber=0
[257226.933745] usb 1-2: Product: USB-Serial Controller D
[257226.933746] usb 1-2: Manufacturer: Prolific Technology Inc.
[257226.940963] usbcore: registered new interface driver usbserial_generic
[257226.940968] usbserial: USB Serial support registered for generic
[257226.941833] usbcore: registered new interface driver pl2303
[257226.941840] usbserial: USB Serial support registered for pl2303
[257226.941848] pl2303 1-2:1.0: pl2303 converter detected
[257226.942410] usb 1-2: pl2303 converter now attached to ttyUSB0

Access raw data

# Add current user to dialout group
usermod -a -G dialout <user> # Connect to serial using screen
screen /dev/ttyUSB0 2400 # Status query using Q1
Q1 # It would write back
(230.1 241.7 230.2 027 60.4 2.28 34.0 00000000 # 230.1 - Input voltage
# 241.1 - Fault voltage
# 230.2 - Output voltage
# 60.4 - Input Frequency
# 2.28 - Battery voltage
# 34 - Temperature

NUT

Config:

vim /etc/nut/nut.conf

MODE=netserver

vim /etc/nut/ups.conf

Add output of nut-scanner:

root@jco-tc-pm01:~# upsdrvctl start
Network UPS Tools - UPS driver controller 2.7.4
Network UPS Tools - Megatec/Q1 protocol serial driver 1.57 (2.7.4)
Supported UPS detected with megatec protocol
Vendor information read in 1 tries
No values provided for battery high/low voltages in ups.conf Using 'guestimation' (low: 20.800000, high: 26.000000)!
Battery runtime will not be calculated (runtimecal not set)

upsc nutdev1

battery.charge: 100
battery.voltage: 27.24
battery.voltage.high: 26.00
battery.voltage.low: 20.80
battery.voltage.nominal: 24.0
device.mfr: device.model: device.type: ups
driver.name: blazer_ser
driver.parameter.pollinterval: 2
driver.parameter.port: /dev/ttyUSB0
driver.parameter.synchronous: no
driver.version: 2.7.4
driver.version.internal: 1.57
input.current.nominal: 4.0
input.frequency: 60.4
input.frequency.nominal: 60
input.voltage: 230.4
input.voltage.fault: 241.7
input.voltage.nominal: 220
output.voltage: 230.1
ups.beeper.status: disabled
ups.delay.shutdown: 30
ups.delay.start: 180
ups.firmware: V022B000D0
ups.load: 30
ups.mfr: ups.model: ups.status: OL
ups.temperature: 34.0
ups.type: online

Installing an on-line UPS and a homelab clean-up

July 3, 2023/Solar & Power/#ups

This is the current state of my homelab. Whenever I go at my server room and attempt to arrange things, I get paralyzed how.

Primary blocking reason is how I should handle supplying power. Currently I have 2 separate line-interactive UPS. One for critical internet-related devices, the other for optional servers.

My original plan was to make a DIY UPS using devices for solar. I “thought” it was cheaper. I planned to use:

  • ATS (automatic transfer switch) if I have to have a maintenance, servers will keep running
  • SNAT 1kw inverter - act like a line-interactive UPS
  • Used LifePO4 battery
  • Rack DIN rail for safety devices - ATS, breakers, DIN power plug

I already bought the components but assembling everything was daunting. I had a safety concern mixing high-voltage devices to the same rack as the server. The rack DIN rails would also have exposed live wires and I wasn’t comfortable with the plan. I purchased before I thought through the plan.

I was in a limbo on how to proceed. My homelab has been in this state for more than a year.

Finding a reasonably-priced On-line UPS

I finally found a reasonably priced online UPS. It’s on-line meaning it has double conversion 230v AC -> 24v DC -> 230v AC. Any power fluctuation won’t reach the devices.

It’s KSTAR YDC9101S RT. It’s only 900w as I don’t intend to run anything more than that. It has a user replaceable battery. It can be replaced while plugged-in. And it can be rack-mounted!

Cost is 10k, including shipping. This is cheap as compared to other on-line UPS I checked. Second-hand UPS without battery is easily around 20k. So I bit the bullet and purchased it.

A proper UPS, finally.

Plan of action

I knew I’ll rabbit-hole to something else when I start working on my homelab. There’s always something else to do. What I did was list what I wanted to accomplish for the day and limit myself to 2 hours.

With a clear plan of action, I started.

Removing deprecated stuff

  • Shoe rack - I used this as a poor man’s rack. It become unmanageable quickly
  • 16-port TP Link switch - turns out I don’t use more than 8 ports anymore. With a new 10Gbe switch, it’s more than enough
  • 2 extension cord
  • 2 UPS with modified batteries

Installing new stuff

  • KStar On-line UPS (bottom)
  • Netgear 10Gbe Switch
  • Rack sliding cabinet - I felt like I needed this to put loose items such as USB keyboard and mouse, extra SFP modules, rack screws. I had instances where I spent an afternoon looking for those.

Finished everything in 2 hours. Listing out what I want to accomplish was handy. It keep me on-track. I feel good about the progress I made with my homelab.

Extending UPS run time

September 2, 2021/Solar & Power/#ups

Last week, we had a 4-hour power outage. Since all our networking equipment is plugged in a UPS, I assumed internet will be up for at least an hour. When I check the logs though, it was only around 15 minutes. This meant the UPS battery needs replacement.

Now, I have an obsession (lol) with uptime. When I searched for a replacement, I was also thinking if it’s possible to make UPS run time longer. It turns out that it’s possible by replacing it with a larger capacity battery. But there are safety precautions.

Safety precautions

Don’t use maximum load of the UPS

Replacing the battery with a larger capacity means that the UPS will run longer than it’s designed. There’s a risk of the inverter overheating if it’s running at high load for long periods.

To prevent this, make sure that connected devices is not using more than 80{5fcd3cbc9de14e1587c4b983f08e4837fa7ae8985dc66bae235a2c5aa0d68677} of rated watts. My UPS is 300w. The devices connected are modem, router, PoE switch, and a low-power server for Omada Controller and PiHole. It totals only to 40-50 watts which is only 16{5fcd3cbc9de14e1587c4b983f08e4837fa7ae8985dc66bae235a2c5aa0d68677} of my UPS rated watts.

I did a 2-hour test running on battery. There was no notable heating with the inverter.

Use the same wire gauge to extend connectors

Larger capacity battery also means it’s bigger. It would have to be outside the UPS casing. Using thin wires will introduce a risk of it heating up and might cause fire.

I didn’t understand how to compute what’s appropriate for this, I just used the same wire gauge as the connector inside the UPS (looked like 12 AWG).

Other than that, things should be fine.

The battery included with it was 12v 4.5Ah. I replaced it with 12v 25Ah (5x more than the original battery). This should provide 4-5 hour run time in case of power loss. I then cut a hole in the side of UPS casing to pass through the wire to the battery.

It’s already installed but we haven’t had a power outage yet to actually see how it will actually perform.