Gate Watcher: Auto-closing My Office Gate with a Vision Model

/CCTV/#cctv #home-assistant #ai

The sliding gate fully closed, slats spanning the whole opening

I have an IoT-controlled gate in my office. I can open and close it from Apple Home through Home Assistant. It’s working fine, never had a problem with it… technically.

There were two instances, though, that I somehow left it open, or open button was accidentally pressed. I only found out the next day that I left the gate opened all night. Both times, I slowly walked into the office hoping nothing was missing.

Thankfully, the two times it happened nobody took anything.

My gate setup is not smart enough that it knows the actual state of the gate (open or close).

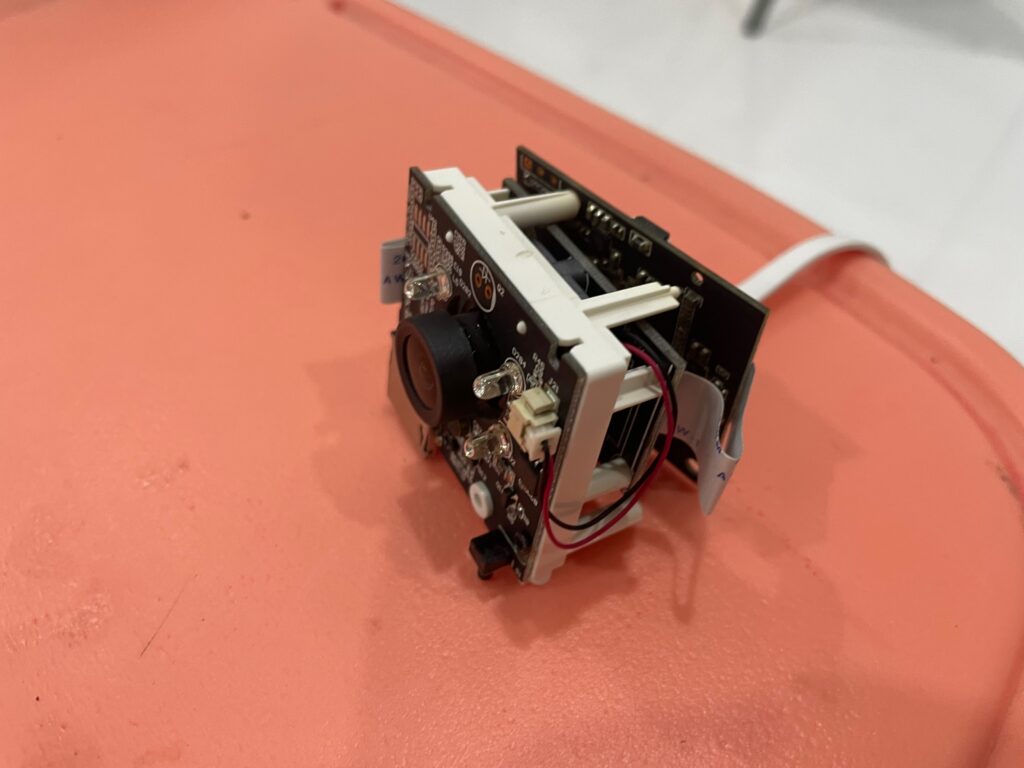
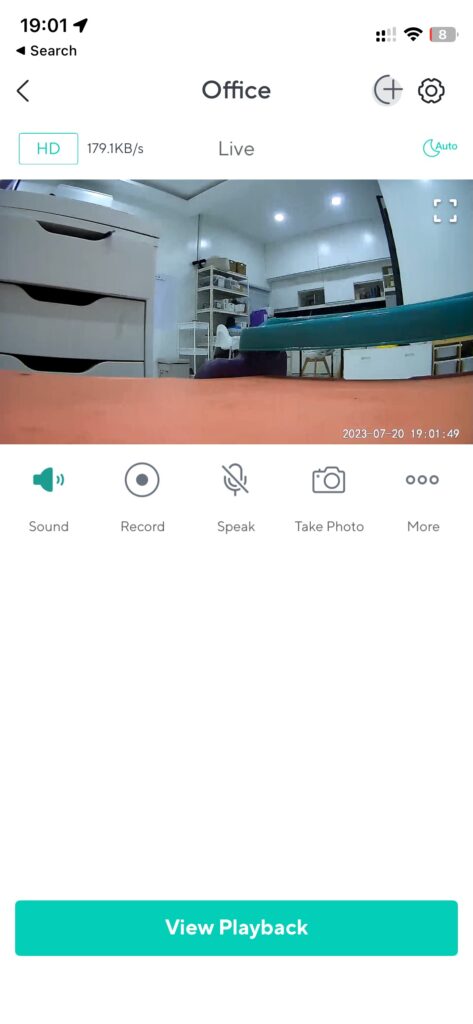
But I have a CCTV camera pointing at the gate.

Making it smart

I’ve been looking for practical use of small models like gemma-4-e4b (supports vision!) which easily fits the GPU in my homelab server. I have it exposed via llama.cpp with llama-swap, an OpenAI-compatible endpoint, and it’s a vision model accessible to any service running in my lab.

I’ve thought of pulling a snapshot every minute and have it process the image using a prompt, then automatically close the gate if left open for 15 minutes.

How it works

Detection is one vision-model call, once a minute.

Each cycle pulls a keyframe over RTSP, crops to the lower-center of the gate, and sends the crop to the model. Temperature 0, thinking off. About a second per call.

You are looking through a carport at a sliding driveway gate, at the lower-center where the driveway meets the exit.

If you see open road/pavement/ground leading outside (gate slid away) it is OPEN.

If a solid row of vertical metal slats/bars blocks the driveway at ground level it is CLOSED.

A gate only partly open (any visible gap to the outside) also counts as OPEN.

Thin bright light-lines BETWEEN the vertical bars are still CLOSED.

When unsure, answer OPEN.

Respond with STRICT JSON only, no prose:
{"state":"OPEN"|"CLOSED","confidence":0-100,"reason":"<short>"}

“When unsure, answer OPEN” is the fail-safe. Better to have a false-positive open, than a false positive close.

The gate slid part-way open: slats on the left, a clear gap to the street on the right Even a partial gap counts as open.

The reply is JSON, so I log a state, a confidence, and a reason. One frame decides nothing. A change needs two polls in a row to agree.

Making it safe

Moving a physical gate is the part to be careful with. The alert always lands before anything moves.

  • Home Assistant pages me after the gate has been open for 15 minutes.
  • It keeps checking for the next 3 minutes. If the gate is still open for three consecutive checks, it triggers the gate to close.

There is currently no obstruction sensor. So before it closes, it takes a fresh frame and asks:

This is a driveway gate opening that is about to be auto-closed.

Is there ANY person, animal, or vehicle in or partly in the gate opening / directly in its path (anything that could be hit by a closing gate)? Be cautious.

Strict JSON: {"blocked":true|false,"what":"<short>"}

If something is blocking, it does not close.

I watched it run on its own once. After 18 minutes, the path was clear, so it closed the gate.

Making it super safe

I still have doubts about the prompt. Even if it double-checks or triple-checks it could still be wrong and cause an accident.

I already have an IR obstacle sensor that can be wired into the gate mechanism to stop it if something is in the way, I just need the time to install it.

Unfortunately, I can’t ask Claude/Codex to do it for me 😛

It’s on my to do list!

Related: Enterprise-grade CCTV on a Consumer-grade Hardware.

Enterprise-grade CCTV on a Consumer-grade Hardware

/CCTV/#cctv
Synology Surveillance Station dashboard displaying a multi-camera grid view for monitoring different locations.
Surveillance Station Dashboard

My Mom asked for a CCTV at their place. There were disputes were a CCTV would have been beneficial to quickly sort out the issue.

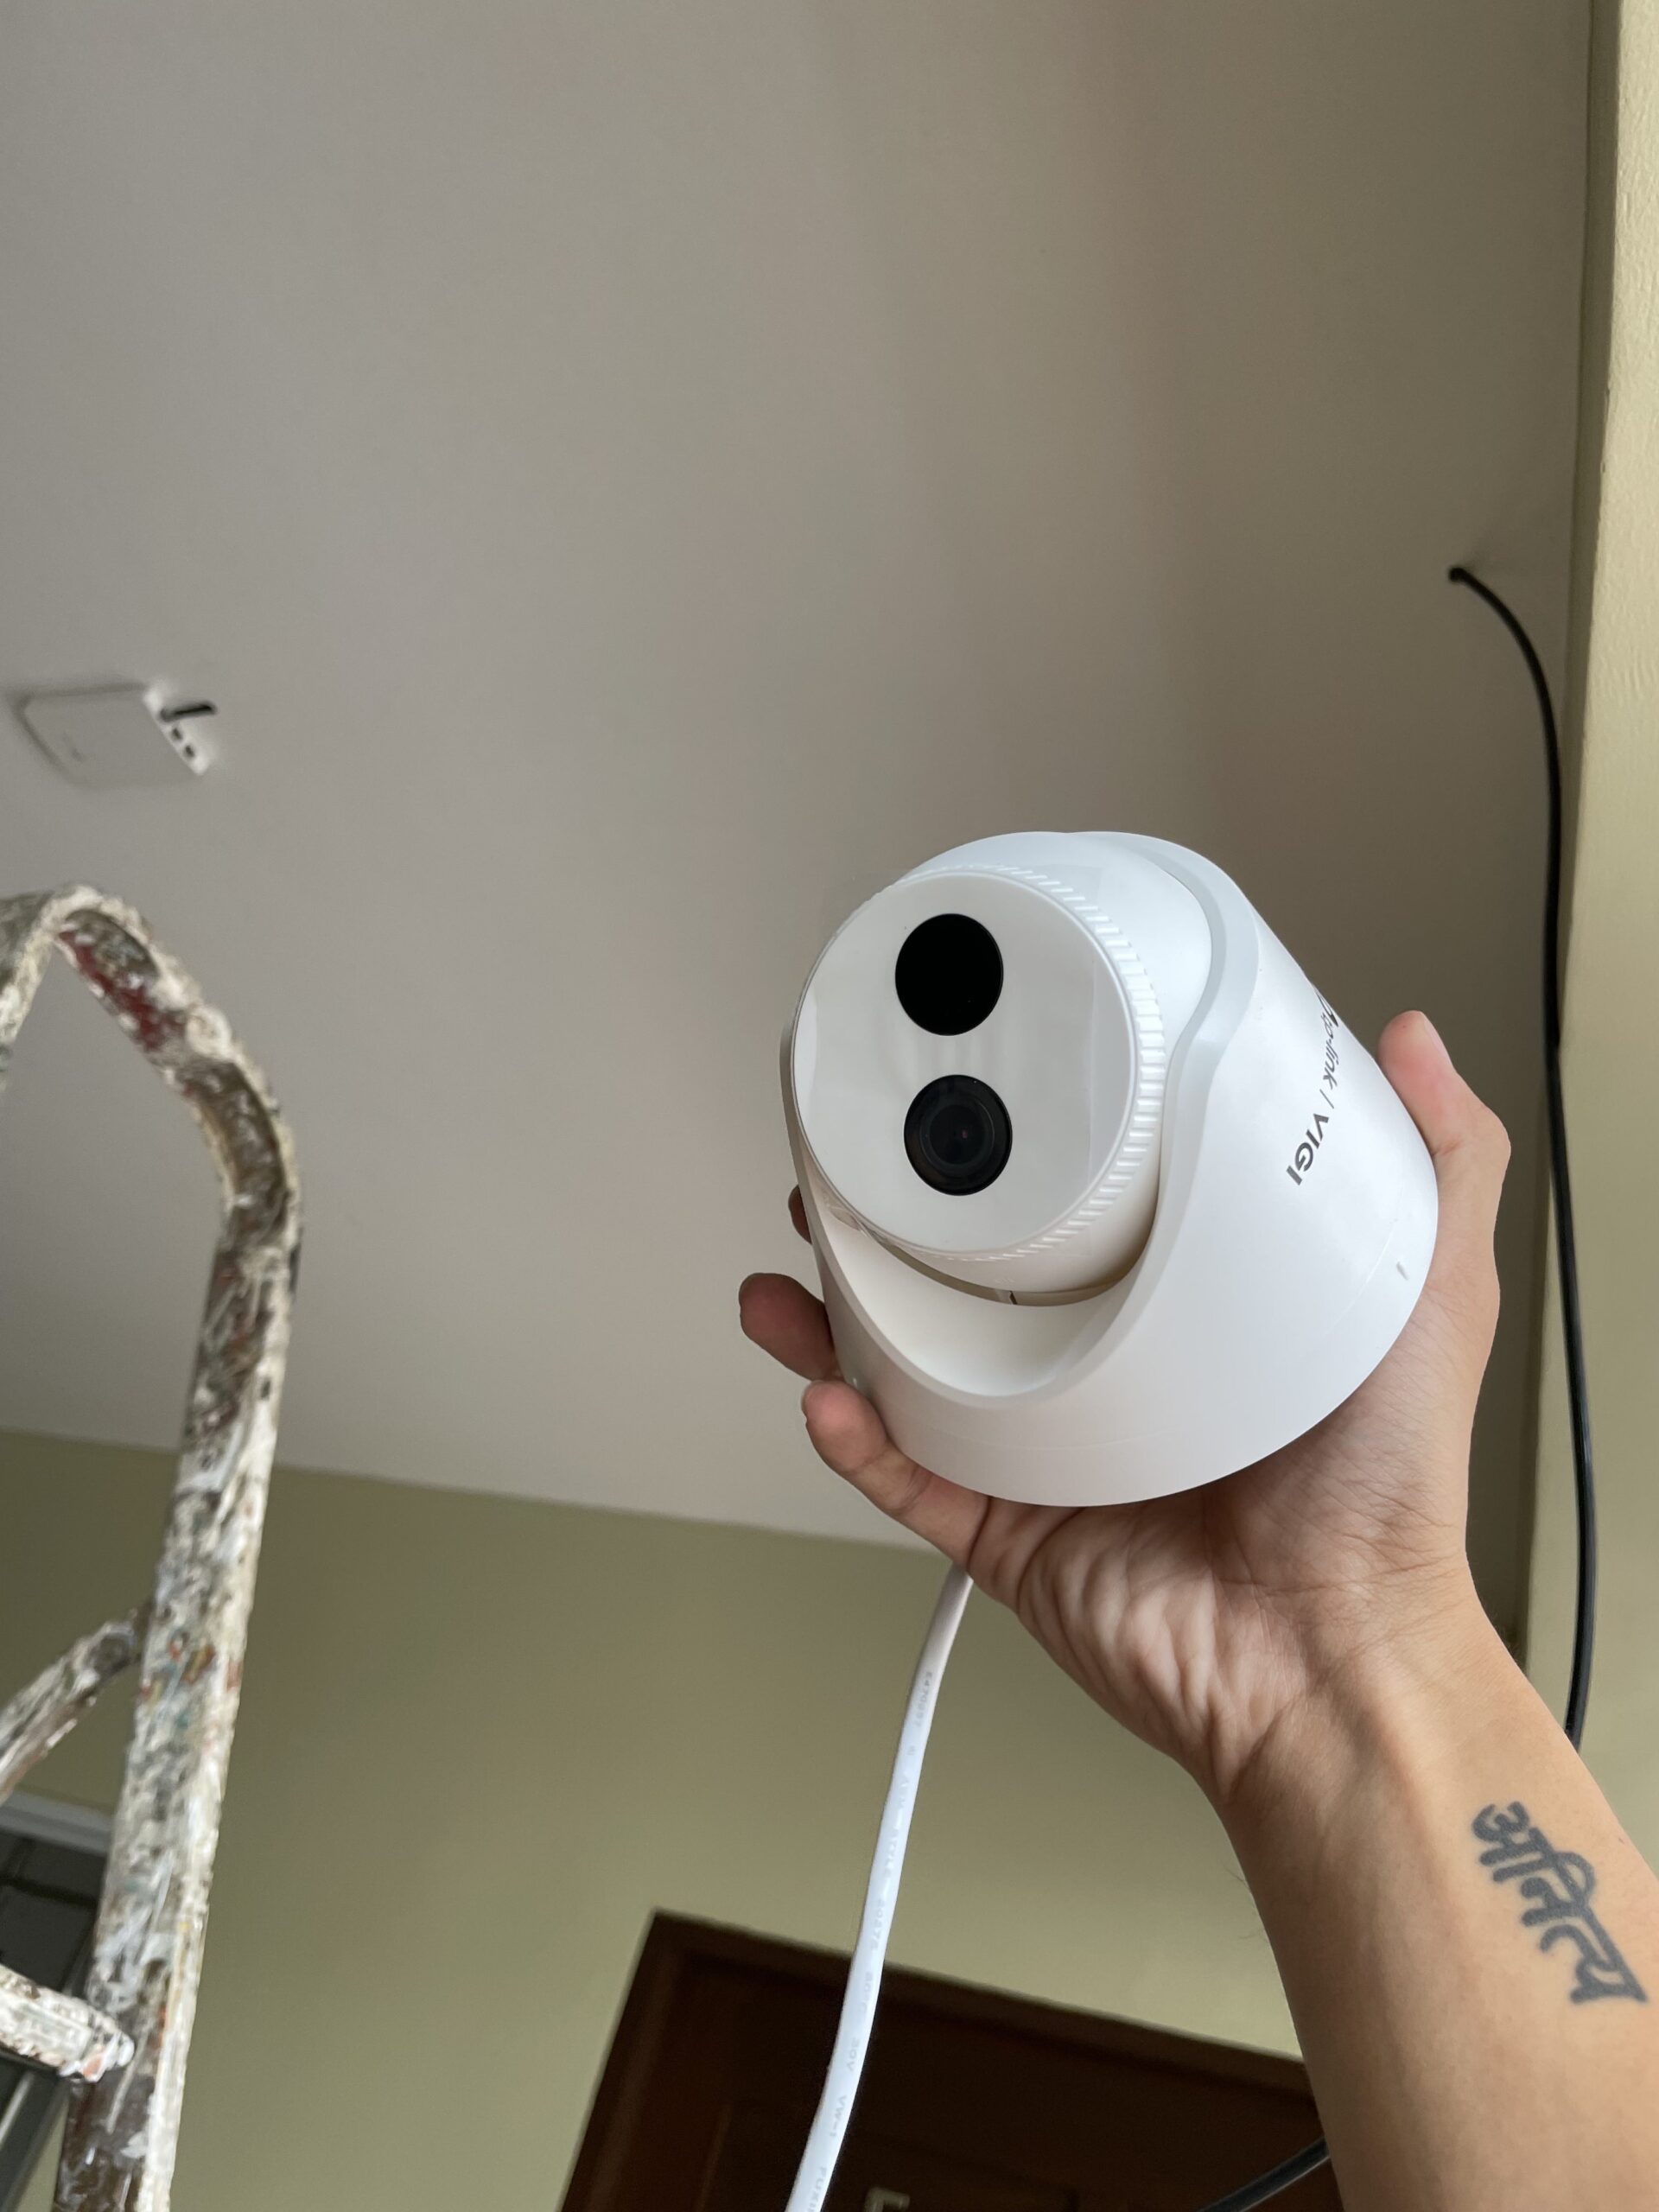
I initially setup the “easy” kind of CCTV. An IoT WiFi-based camera, but it turned out not to be reliable. It saves its data on a MicroSD, and it easily burn out after a couple of months, wireless connection gets disconnected intermittently, and the camera itself is unpredictable and hangs from time to time.

A person holds a white VIGI IoT WiFi-based camera that was initially used before switching to a PoE solution.
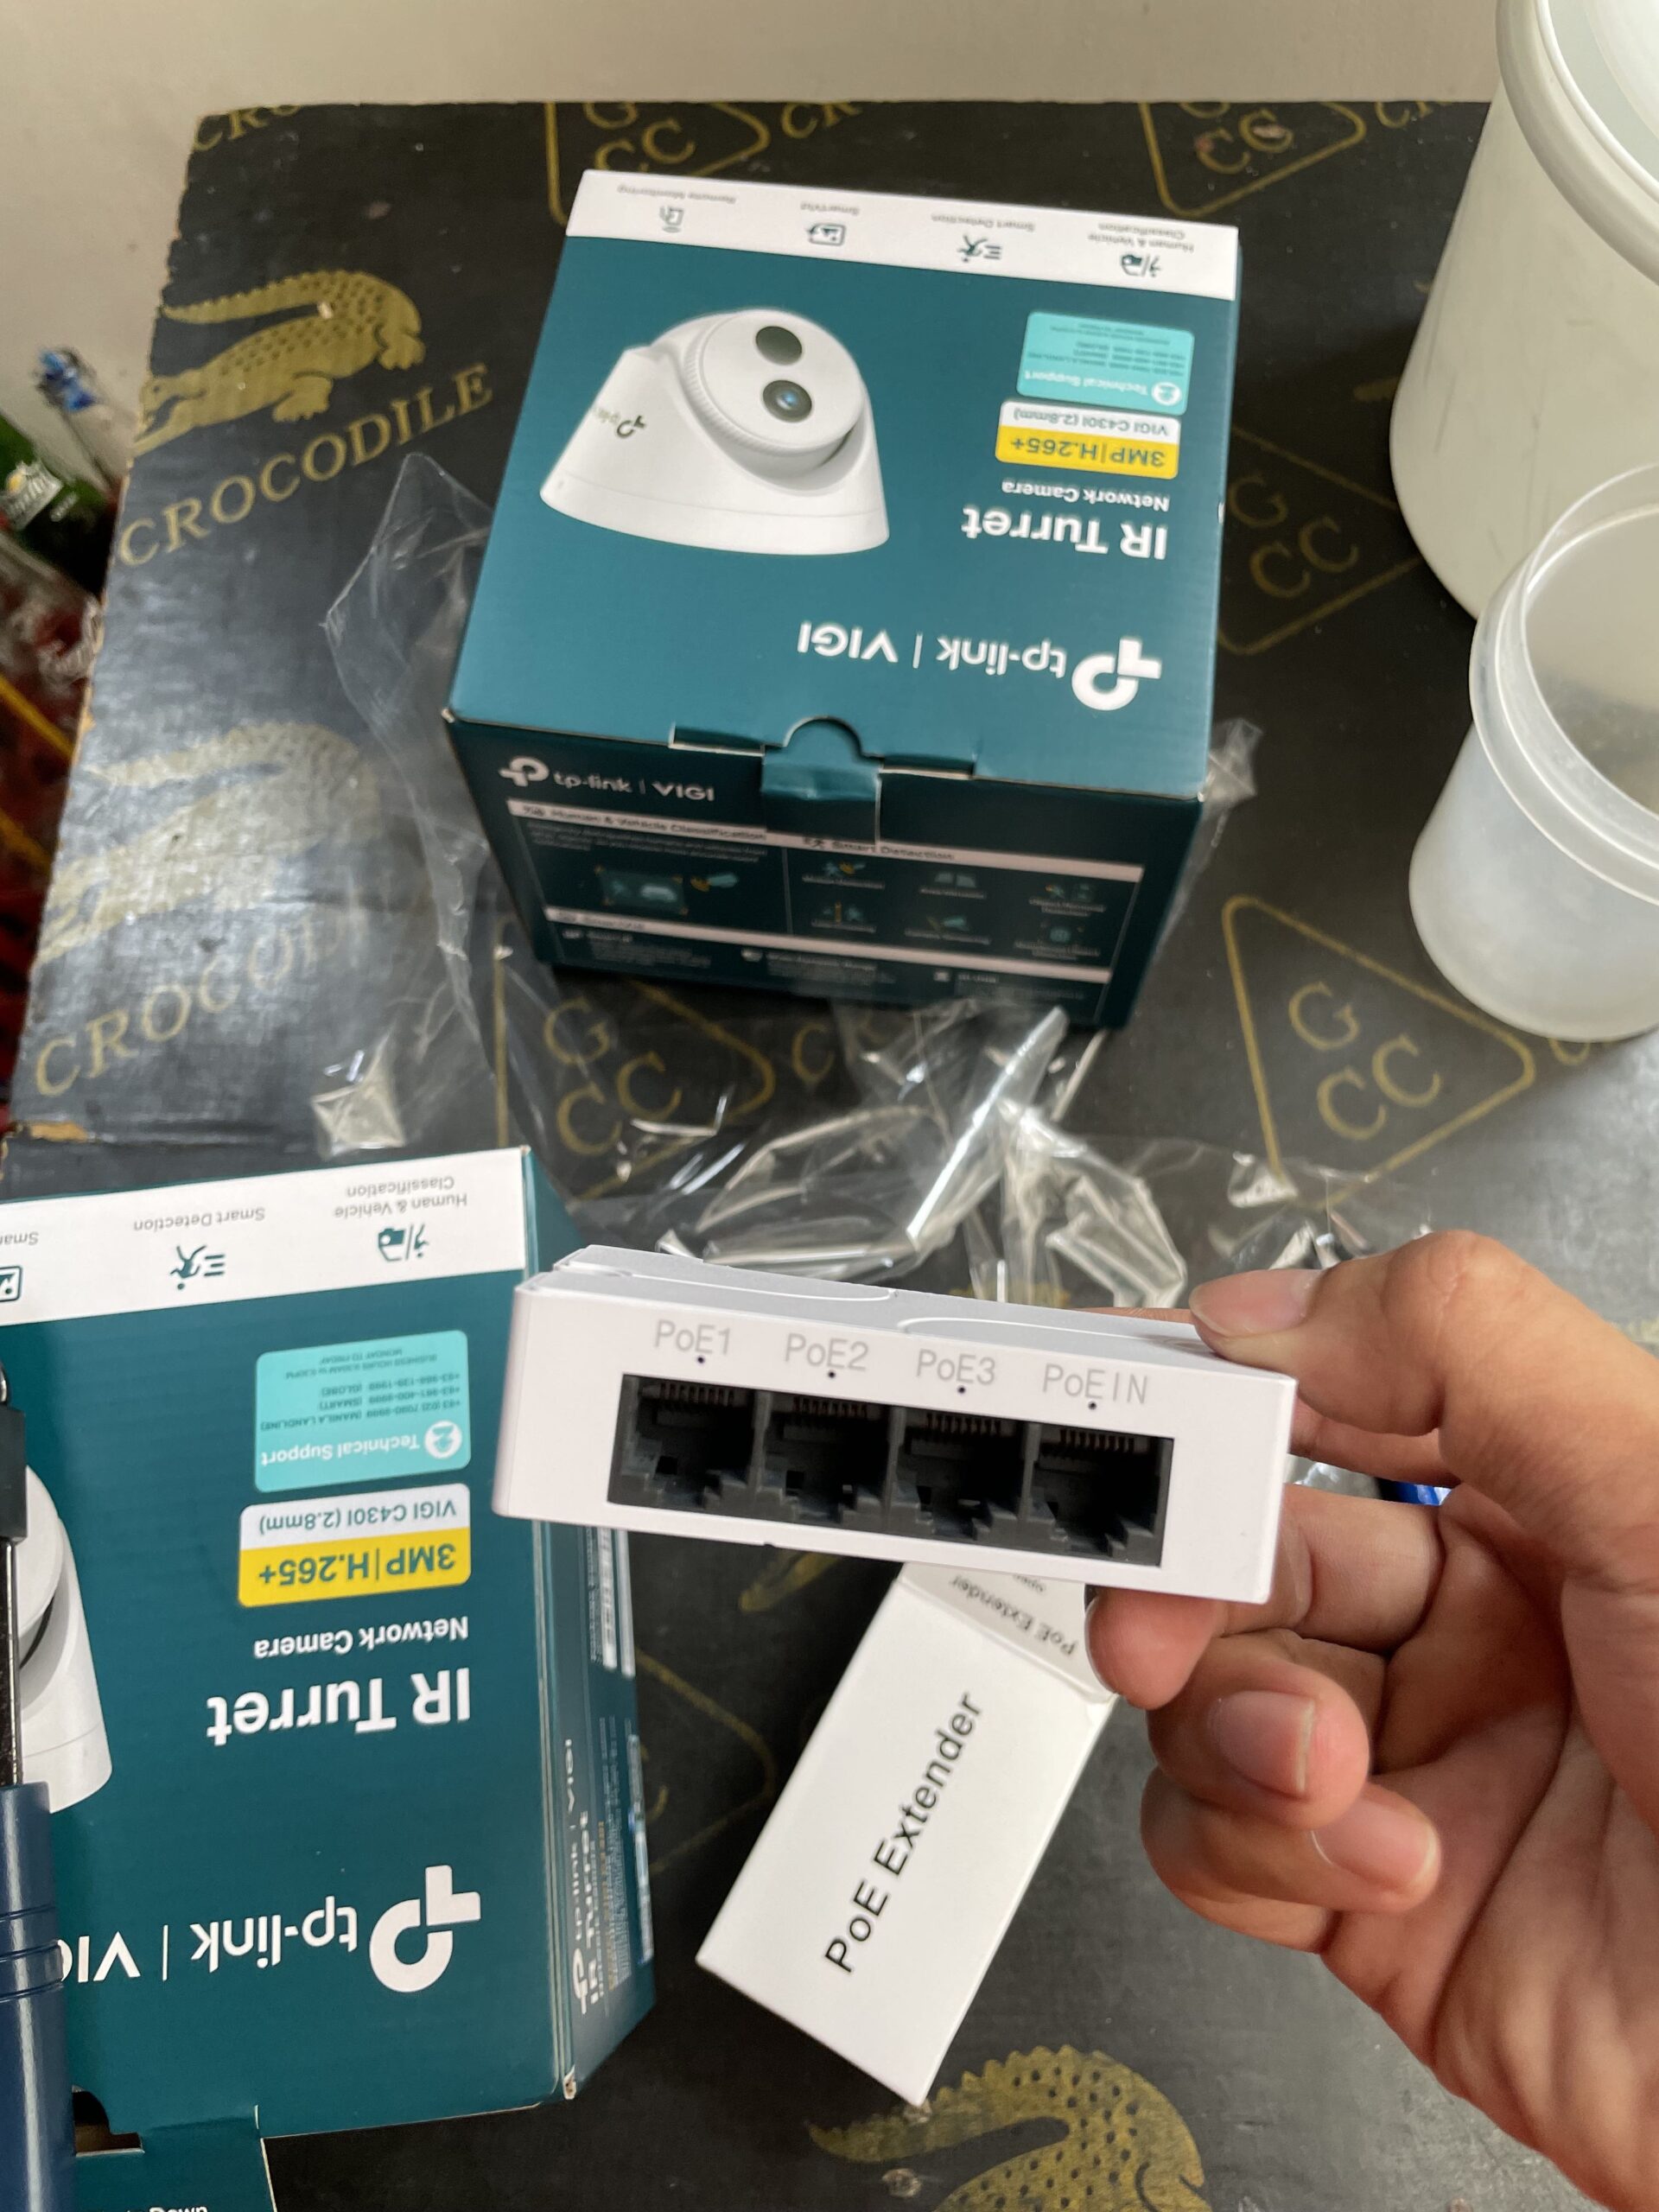
A person holds a PoE extender next to boxes of TP-Link VIGI network cameras.

I switched to PoE-based solution which is far better that what I initially installed.

Network Video Recorder

With PoE Camera, it does not have it’s own storage. The data has to be stored somewhere, which is the NVR (Network Video Recorder)

I have an existing server for Crystaldrin Network which serves various purposes including a NAS (Network Attached Storage). I was looking for something I could virtualize and use the same storage already available.

I explored a couple of software solutions and I decided on Synology’s Surveillance Station. The good things is, it’s Linux-based, and there’s a community that allows it to run in a virtualized environment: https://xpenology.com/forum/

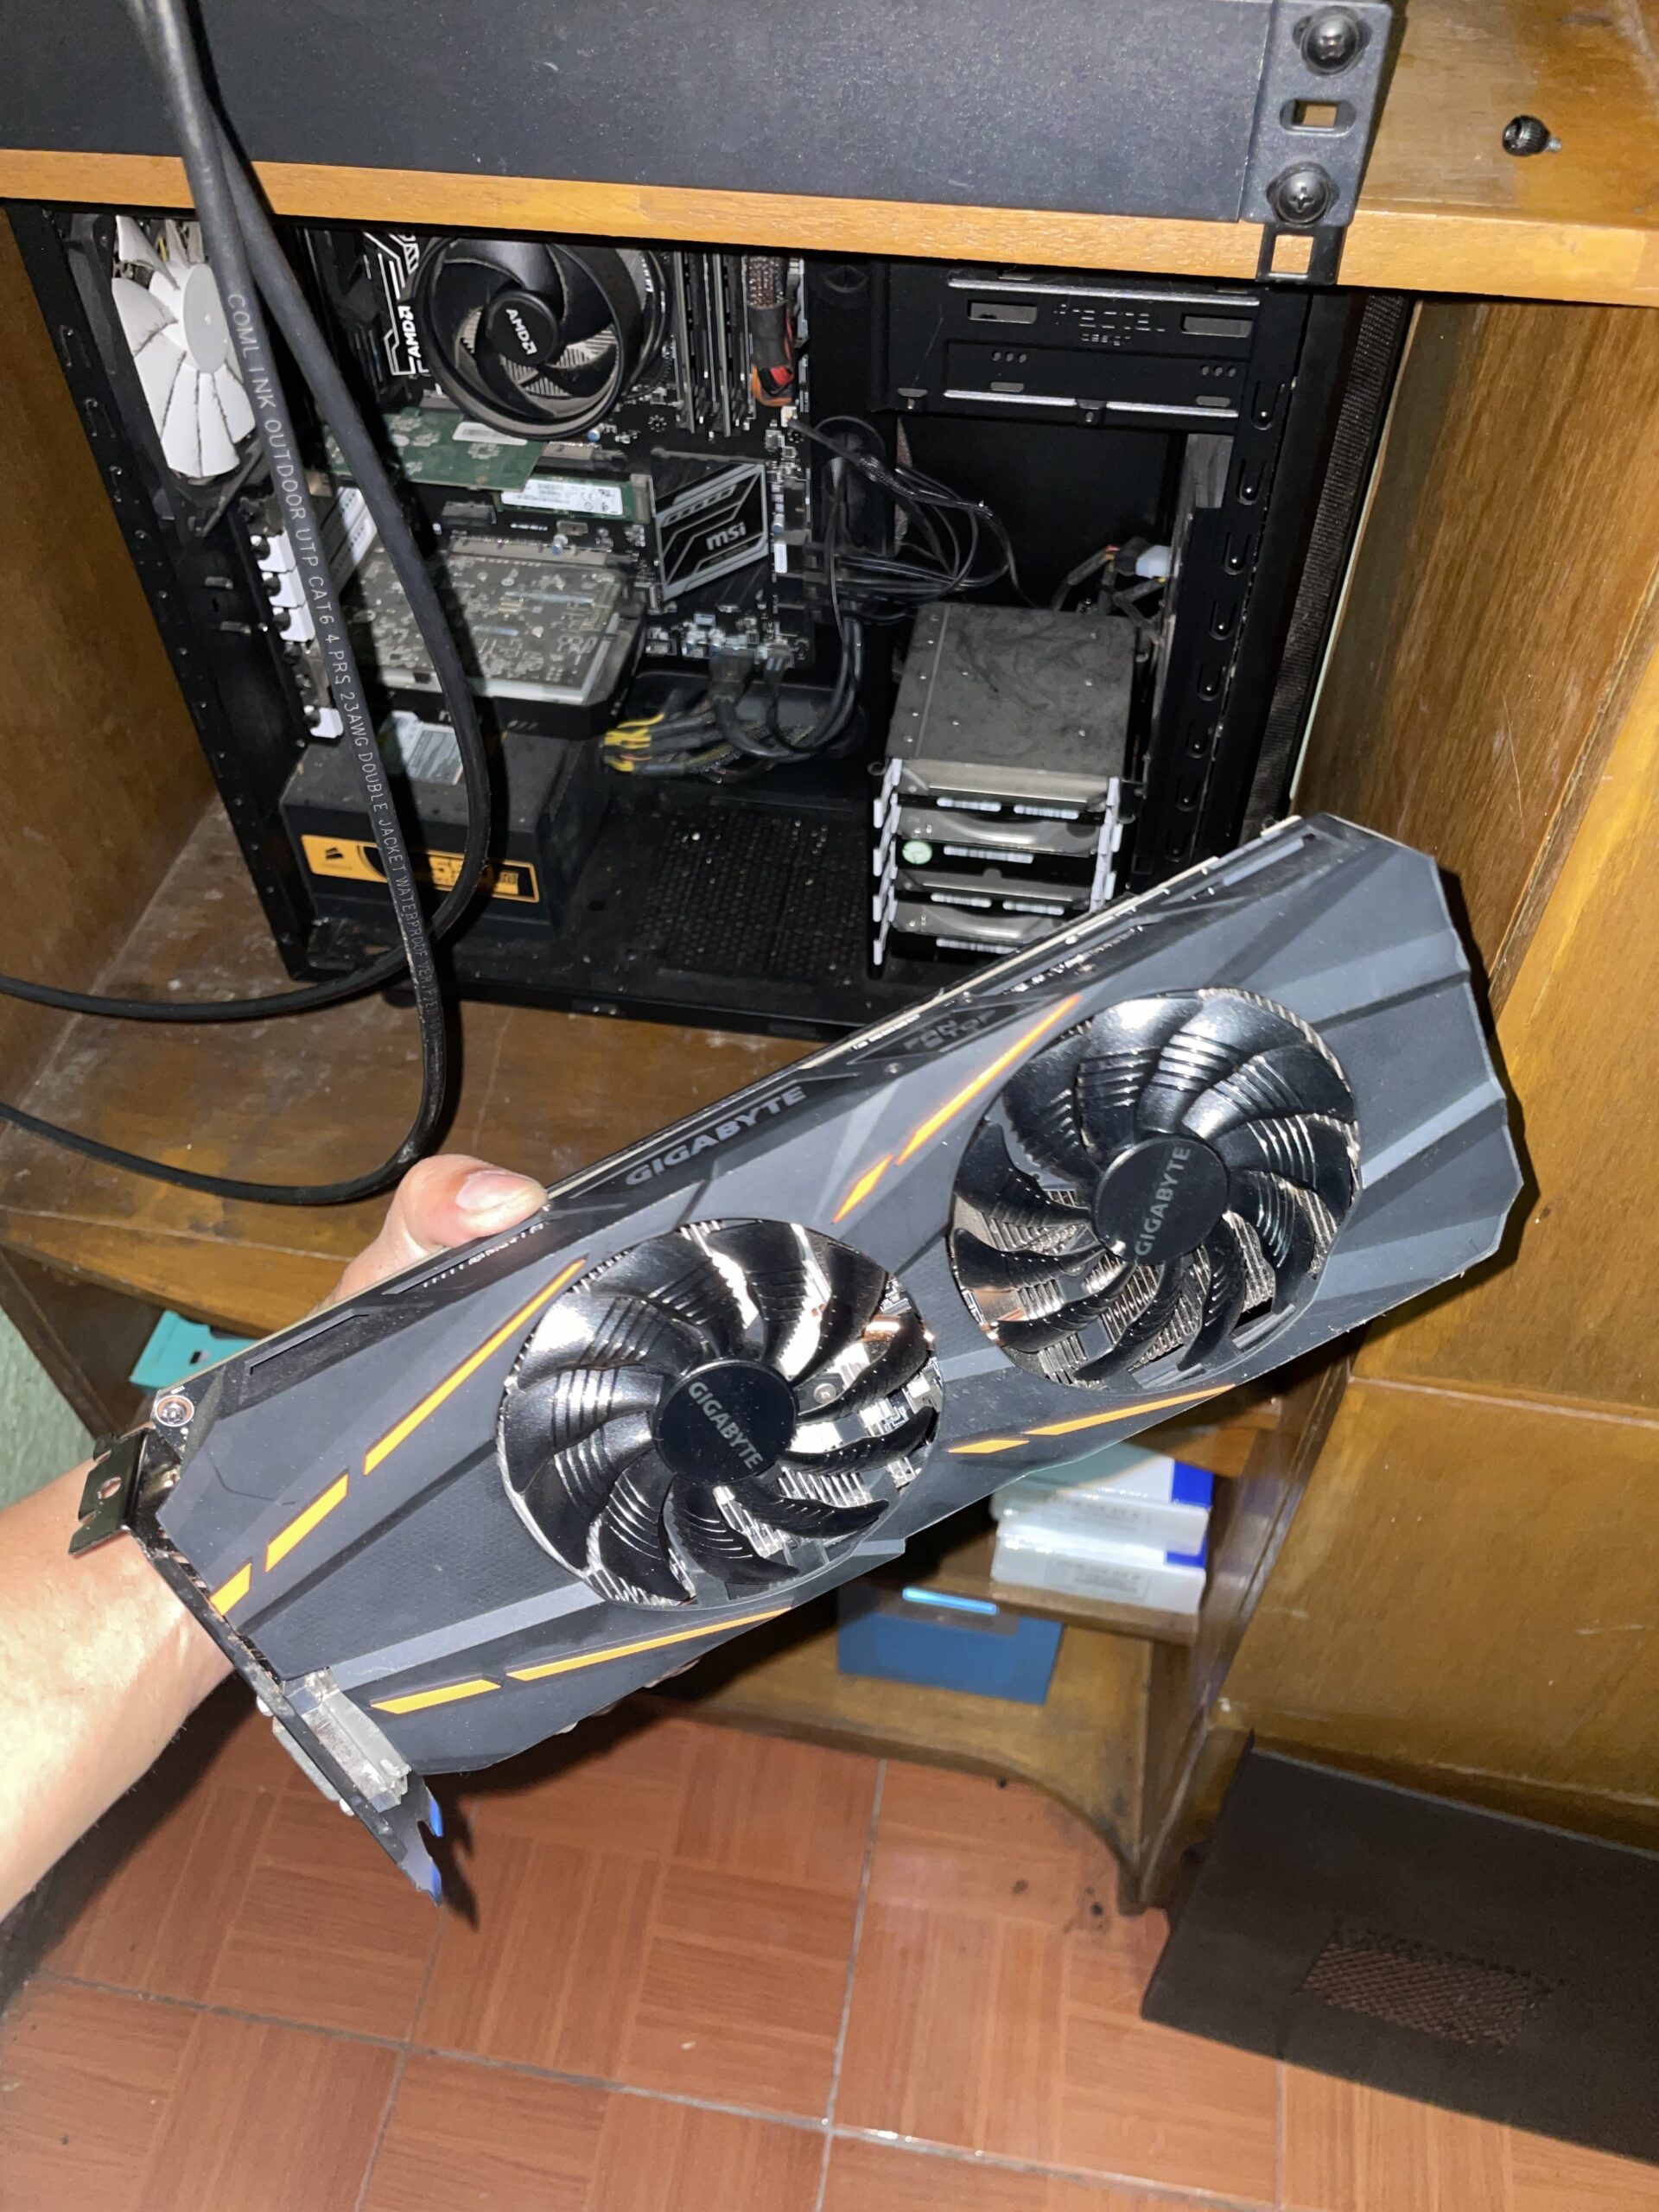
I chose to emulate DVA3119 since I had a unused Nvidia GTX 1060 3gb lying around which would allow me to use deep learning features such as facial recognition and object detection.

A person holds a Gigabyte Nvidia GTX 1060 3gb graphics card intended for use in a Proxmox server.
GTX 1060 3gb
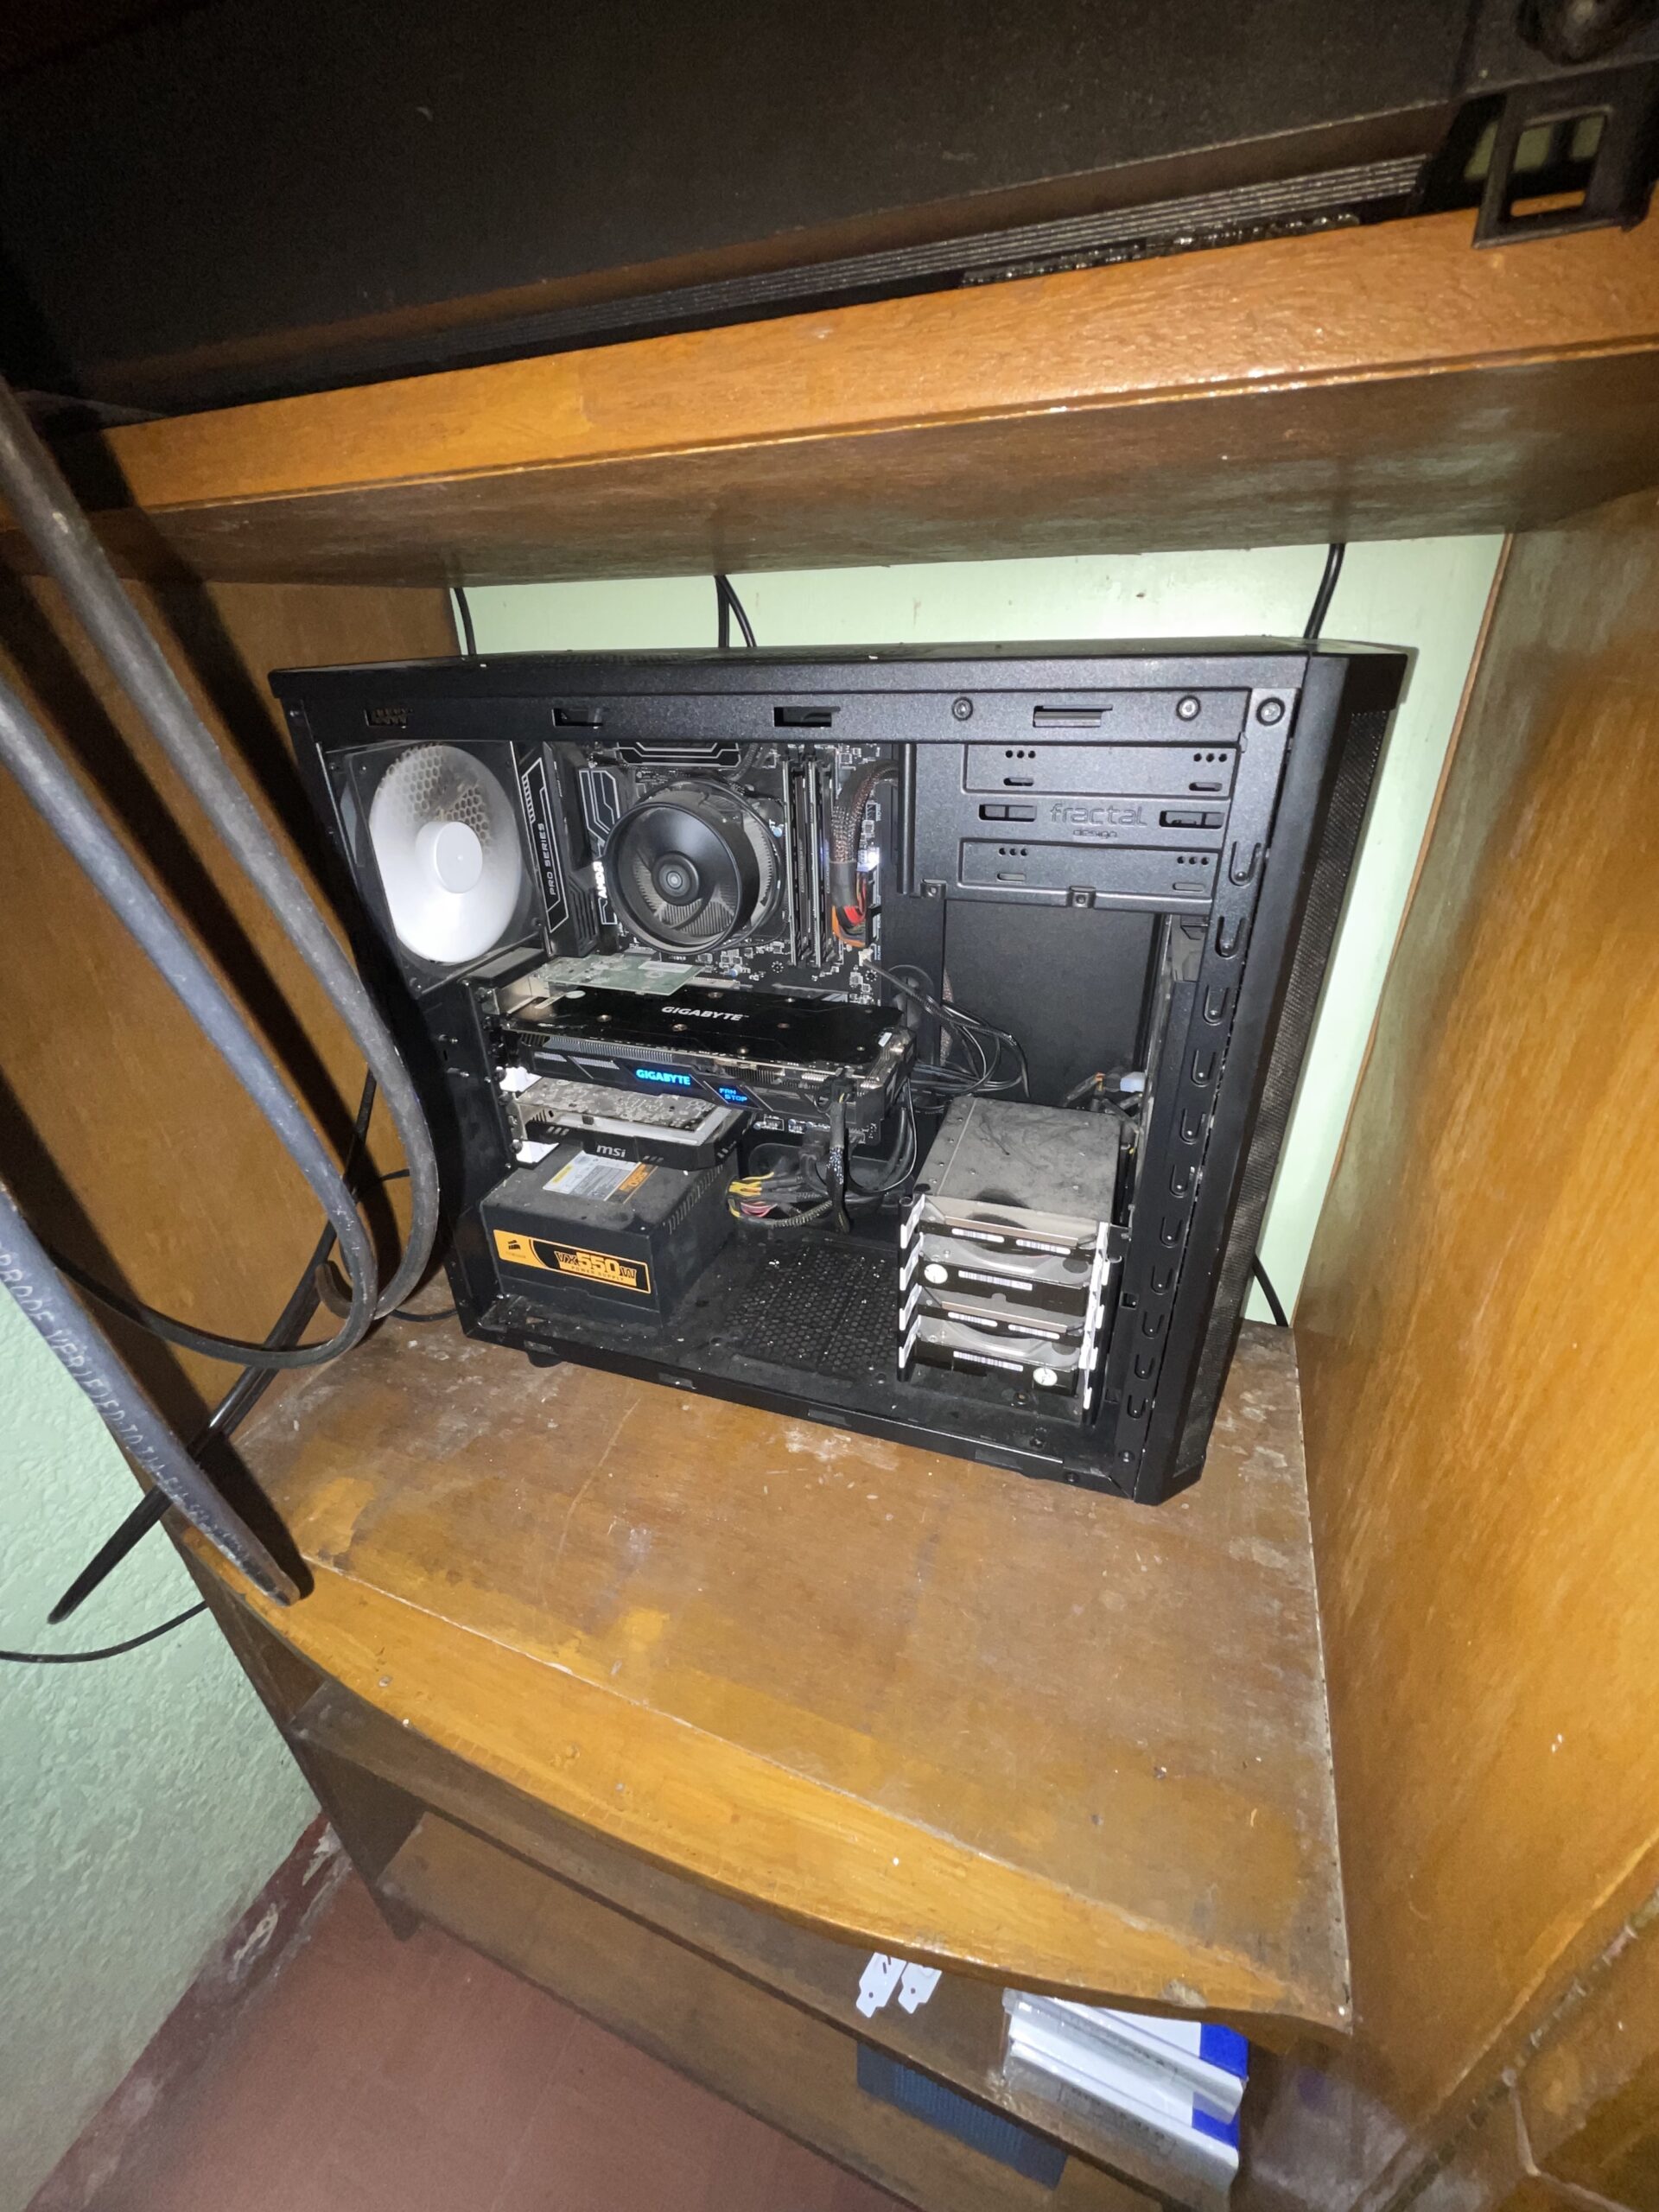
An open Fractal Design computer case containing a GTX 1060 GPU being used for an enterprise-grade CCTV server.
After installation to the server
Proxmox hardware configuration screen for Virtual Machine 101 showing assigned resources and PCI device settings.

I have it running on my Proxmox server with the GPU passed-through to guest virtual machine.

Synology Control Panel showing the hardware details and successful detection of a GeForce GTX 1060 GPU.

The GPU gets successfully detected by the virtual machine after booting it up.

Object Detection

This is where things got exciting for me. I think the usefulness of a CCTV comes with the ease on how easy it is to find what you’re looking for.

Surveillance Station’s interface itself is very intuitive. It also have a mobile app so it can be accessed remotely.

What’s more is they added features that can detect objects (e.g. plate number, people, vehicles). With this info, you can filter by time and date and/or people and/or plate numbers.

Surveillance Station interface showing object detection results for people and vehicles.

Backup Power

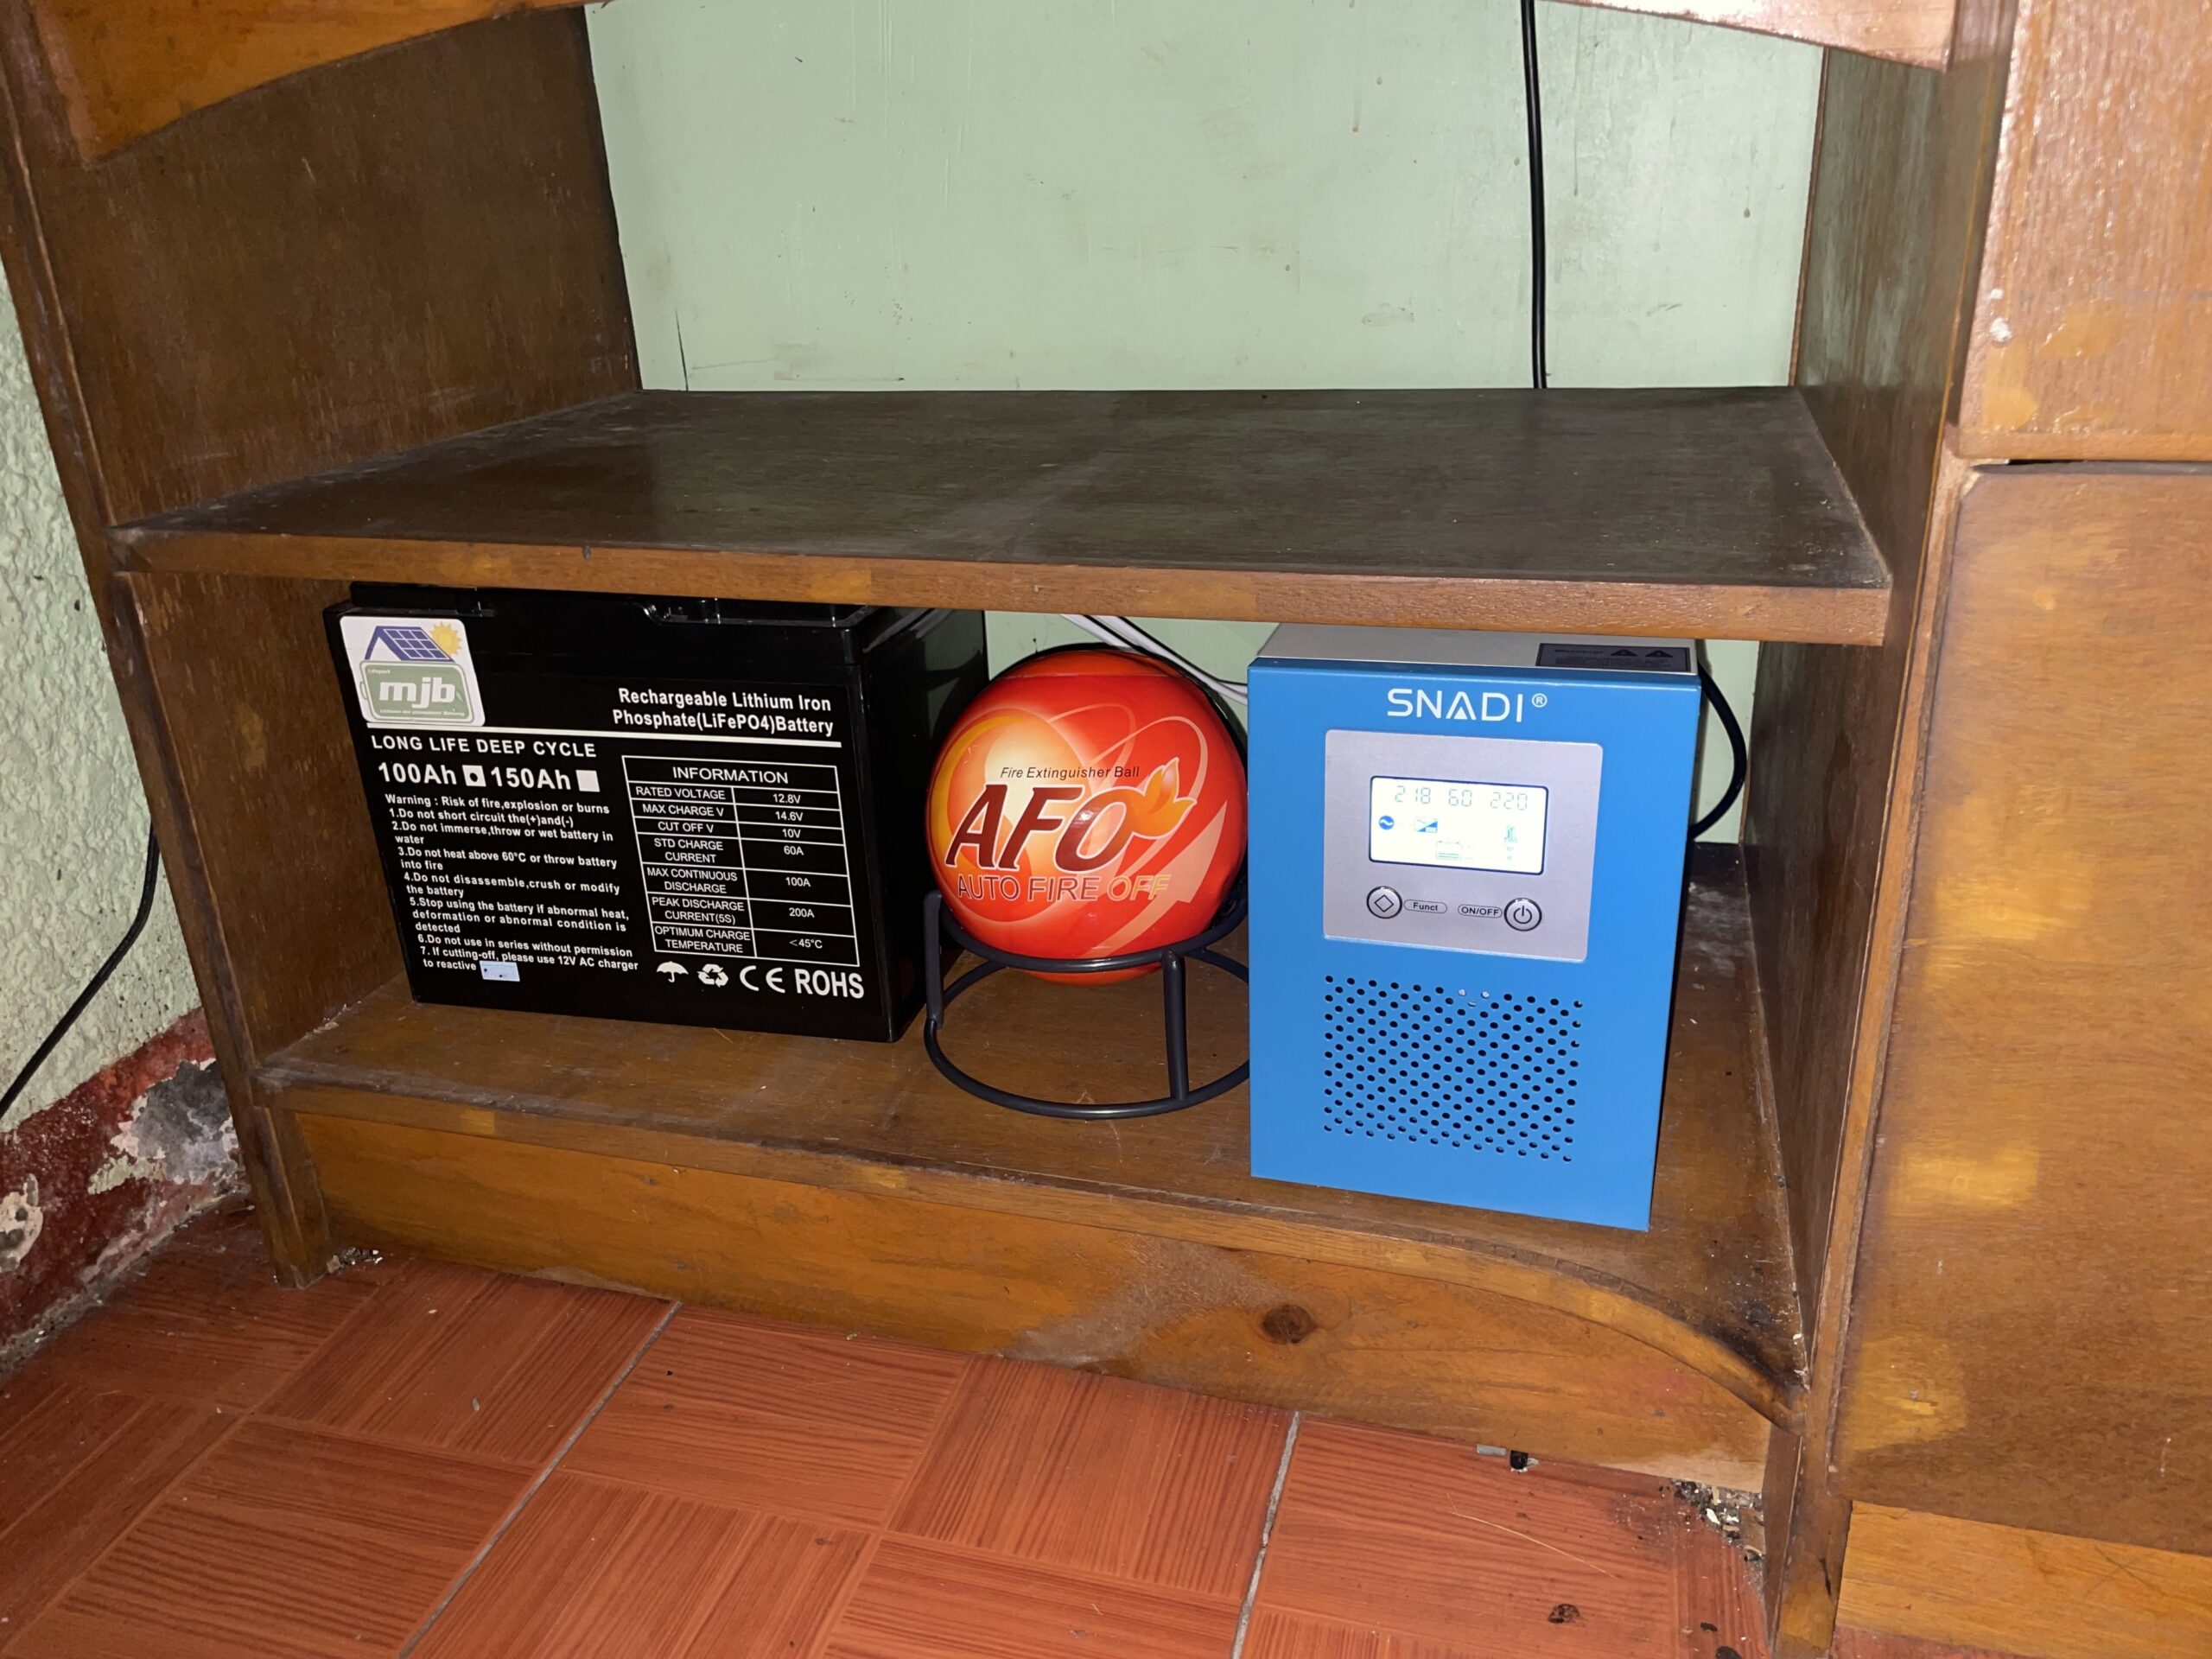
To make it more enterprise-y, it has to be somehow resilient to power interruption. Since the camera are powered over ethernet, I only have to have a backup power for the PoE switch.

A 100Ah LifePO4 battery and SNADI inverter provide backup power for the CCTV system.

I used SNADI 1kw with a 12V 100Ah LifePO4 battery. Based on my computation, it should run around 6 hours without power from Meralco.

This was a fun project. I get a lot of satisfaction finding uses for old hardware. This project is definitely one of those.

Related: Xpenology NVR - DVA3219 + GTX 1060 Works and Wyze Cam v2 and Xiaofang 1S: Webcam Mode and Custom Firmware.

Wyze Cam v2 and Xiaofang 1S: Webcam Mode and Custom Firmware

/CCTV/#cctv

Three white smart cameras, Wyze Cam v2 and Xiaomi Xiaofang 1s, sitting side by side on a white surface.

For the past couple of days I’ve been experimenting with Wyze Cam v2 and Xiaomi Xiaofang 1s. It’s an identical product that has Ingenic T20 as SoC.

It’s a camera we used 3-4 years ago but stopped using because of general unreliability (microSD regularly burning out, occasional disconnection).

I really did not have any goal other than leisurely tinker around. It has a couple of custom firmware/firmware modification projects actively being developed I want to try first hand.

Hunch: WiFi is the cause of unreliability

I think the primary issue I had when I was using this was consistent disconnection that required a power cycle. Unreliability for a device that’s meant as a “security” camera made it undesirable.

My hunch is it’s because of the WiFi connection. It has a RTL8189 WiFi chip that’s using 2.4 Ghz only, which likely already noisy. Video data stream is high-bandwidth already running 24/7.

I had the idea of trying not using WiFi altogether.

There are a couple of ways to do it:

As a Webcam

Wyze has a webcam-only firmware which surprisingly works on both Wyze Cam v2 and Xiaomi Xiaofang 1S.

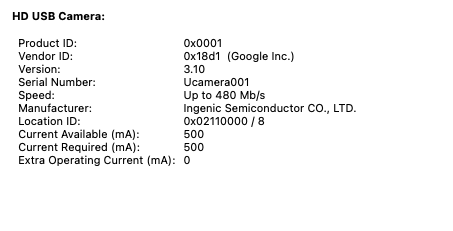
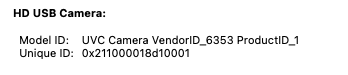
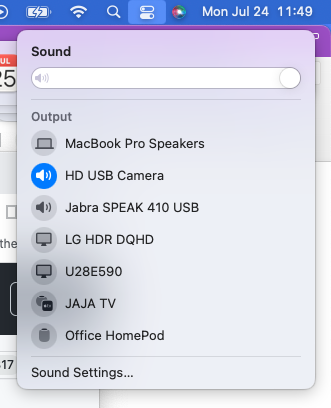
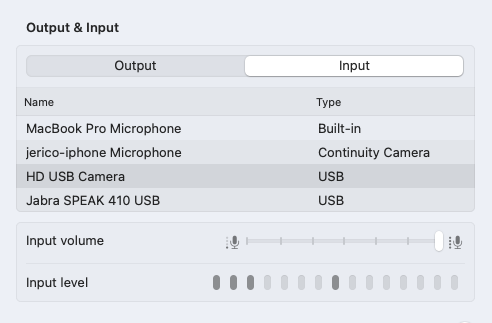
It shows up as a USB Video Class (Webcam), Mic, and Speaker.

System information for an HD USB Camera showing Google Inc. as the vendor ID. A screenshot showing the HD USB Camera model and unique ID for a device in webcam mode. MacOS sound menu showing HD USB Camera as a selected audio output device. MacOS Output and Input settings window showing various microphone input options including USB devices.

The speaker does not sound good, but it works.

Doing it this way would require a PC to host the webcams, make the video stream available in the network via RTSP. Possibly using v4l2rtspserver or go2rtc.

Benefit is it removes the network and data processing off the camera, but it will be limited by USB cable length.

Problem: USB cable length

RJ45 extension does not work

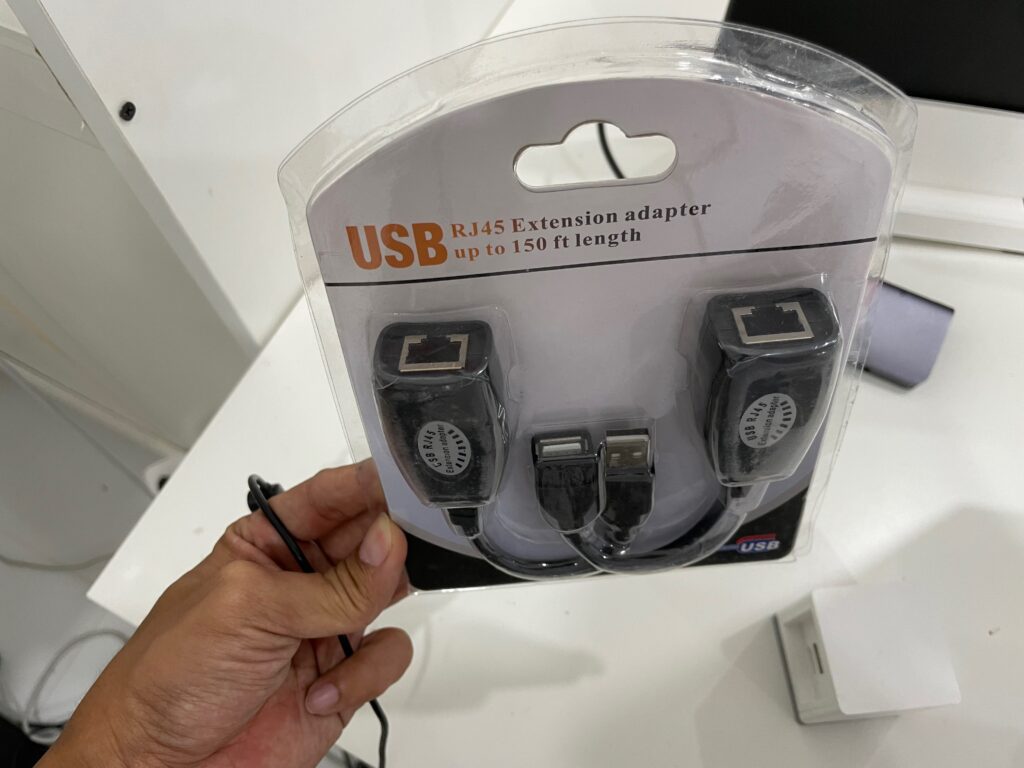
I checked if there’s a USB to RJ45 to USB. RJ45 is very easy to extend and terminate. And there is:

A USB RJ45 extension adapter in packaging.

Link: https://s.lazada.com.ph/s.7ZW19
Price: Php 138.00

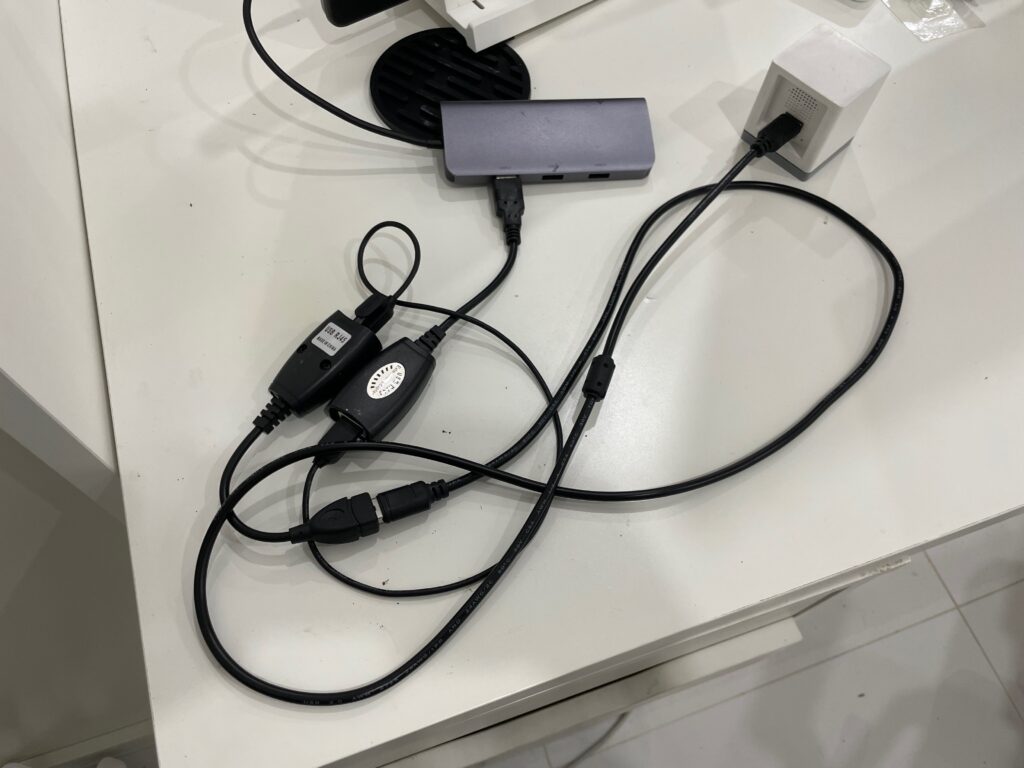
A tangle of USB cables and adapters connected to a grey device and a white power brick on a white surface.

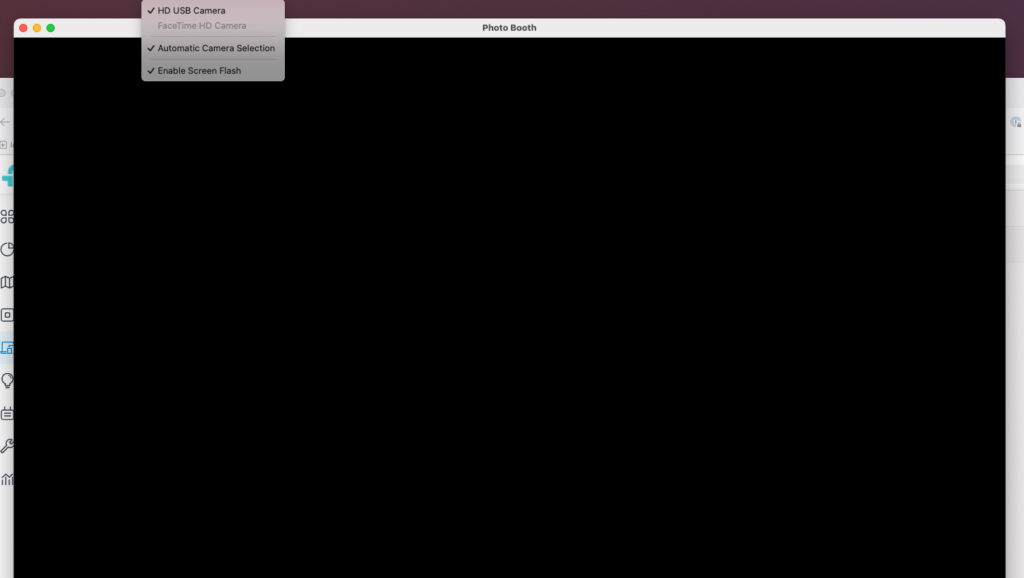
Even with 0.5m CAT6a cable, the video signal does not work. The device shows up in the device list but the video is just black. I think it has to do with data integrity not being retained after passing through CAT6 cable.

A Photo Booth window shows a black screen despite the HD USB Camera being selected in the camera menu.

To verify that it was not a defective adaptor, I tried a USB mouse which worked.

10 meter USB-A to USB-A worked

A long black USB cable connects a white power adapter to a grey USB hub on a white desk.

The longest USB-A to USB-A cable I found is 10 meters. It worked without issue.

Link: https://s.lazada.com.ph/s.7ZWZQ
Price: Php 139.00

Problem: USB root hub cannot support more than 3 cameras at the same time due to bandwidth constraint

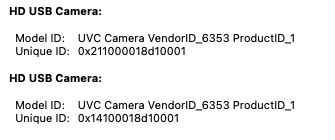
I tried plugging in 2 camera and my Mac supported running it at the same time. Both seem to have a different Unique ID.

A screenshot showing two HD USB Cameras with different Unique IDs to demonstrate they are recognized separately.

Reference: https://www.any-maze.com/support/guides/connecting-multiple-usb-cameras-to-a-computer/ As a rule of thumb, you can only connect three USB cameras to a single USB controller.

Video4Linux

Supported format includes H264, meaning no encoding needed. This might also mean that the camera will need less bandwidth because the stream is already compressed.

# v4l2-ctl -d /dev/video0 --list-formats-ext
ioctl: VIDIOC_ENUM_FMT Type: Video Capture
[0]: 'MJPG' (Motion-JPEG, compressed)
  Size: Discrete 640x360
    Interval: Discrete 0.033s (30.000 fps)
  Size: Discrete 1280x720
    Interval: Discrete 0.033s (30.000 fps)
  Size: Discrete 1920x1080
    Interval: Discrete 0.033s (30.000 fps)
[1]: 'YUYV' (YUYV 4:2:2)
  Size: Discrete 640x360
    Interval: Discrete 0.033s (30.000 fps)
  Size: Discrete 1280x720
    Interval: Discrete 0.200s (5.000 fps)
  Size: Discrete 1920x1080
    Interval: Discrete 0.200s (5.000 fps)
[2]: 'H264' (H.264, compressed)
  Size: Discrete 640x360
    Interval: Discrete 0.033s (30.000 fps)
  Size: Discrete 1280x720
    Interval: Discrete 0.033s (30.000 fps)
  Size: Discrete 1920x1080
    Interval: Discrete 0.033s (30.000 fps)

Useful link on debugging UVC on Linux: https://gist.github.com/lucasw/85dc92c9f5146e9d5175a33b49ef4a90

USB Direct

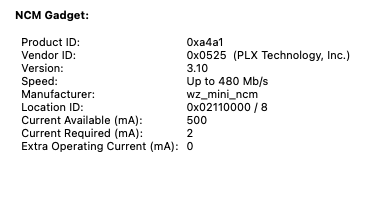
This method makes the camera show up as a network device. Processing will still be in camera. It can be configured like connected to a network.

A terminal output showing NCM Gadget device details for a Wyze Cam v2 or Xiaofang 1S using USB Direct mode.

I have not tried this yet though as I could not wrap my head around the network settings needed.

Link: https://github.com/gtxaspec/wz_mini_hacks/blob/master/documentation/usb-direct.md

USB to Ethernet Adaptor

I have not tried this yet but it requires a USB to Ethernet Adaptor and a separate way to power up the device.

Firmwares

wz_mini_hacks

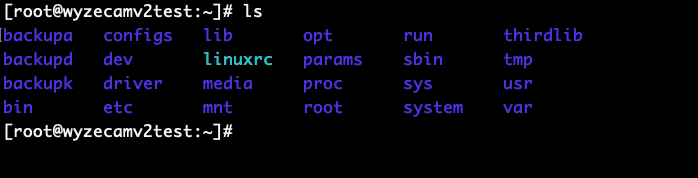
A terminal window shows the root directory contents of a device after gaining root access.

Root access

A code editor displays the wz_mini.conf configuration file used for customizing Wyze Cam firmware.

Building firmware for v2

Terminal output showing the successful building of wz_mini_hacks firmware for Wyze Cam v2.

Firmware for Wyze Cam v2 is not made available for download. There’s a script that unpacks the firmware and replace the kernel, then repacks it.

The automated part to download the firmware is not working anymore because Wyze removed older firmwares. It only supports v2 4.9.8.1002 and pan v1 4.10.8.1002. It could theoretically support other version if the offset where to write the modified kernel is set. I did not dig deeper how to do this.

openmiko

Implements it’s own code to expose Ingenic T20 video streams. Supports 1080p by default. Only works with Wyze Cam v2.

Link: https://github.com/openmiko/openmiko

Xiaom-Dafang-Hacks

Compatible with both Wyze Cam v2 and Xiaomi Xiaofang 1S.

Link: https://github.com/EliasKotlyar/Xiaomi-Dafang-Hacks

docker-wyze-bridge

Not really a firmware but a bridge to expose native Wyze streams as RTSP.

Not reliable.

Link: https://github.com/mrlt8/docker-wyze-bridge

Firmware mix-and-match

Since both cameras are the same hardware-wise, I tried mix and matching:

FirmwareWyze Cam v2Xiaomi Xiaofang 1S
Wyze Webcam FirmwareYesYes
OpenMikoYesNo
Xiaomi-Dafang-HacksYesYes
wz_mini_hacksYesNo
Official Wyze FirmwareYesNo

Hardware Mods

Since I have a lot of these cameras, something will inevitably fail.

Interchangeable Camera Module

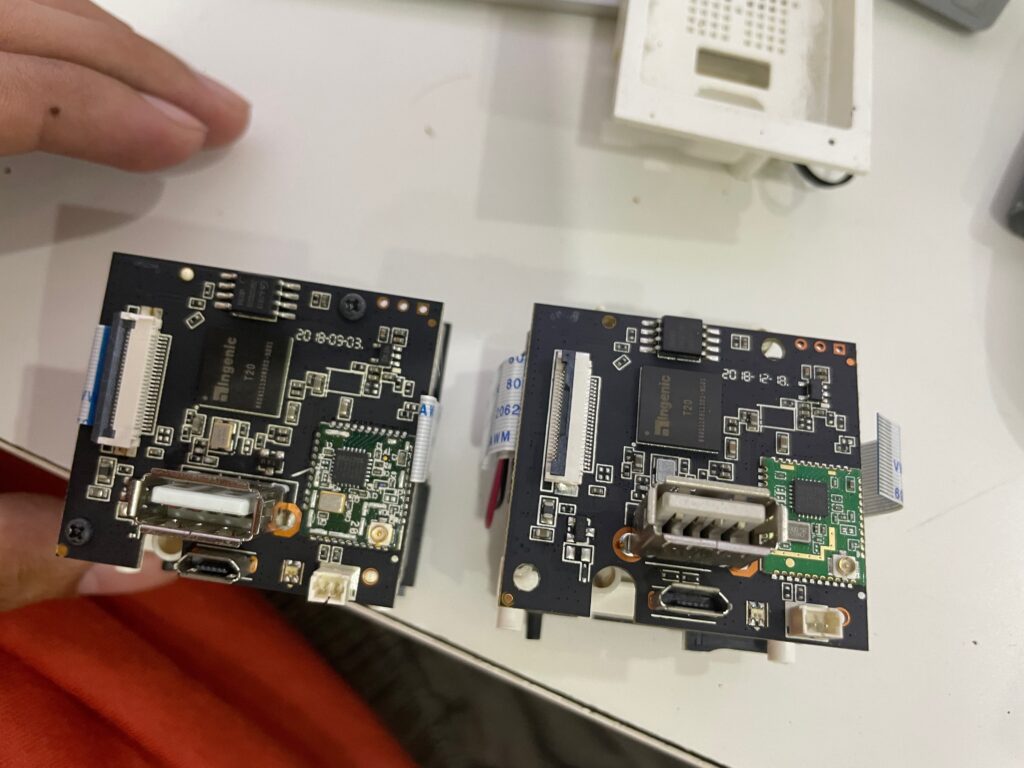
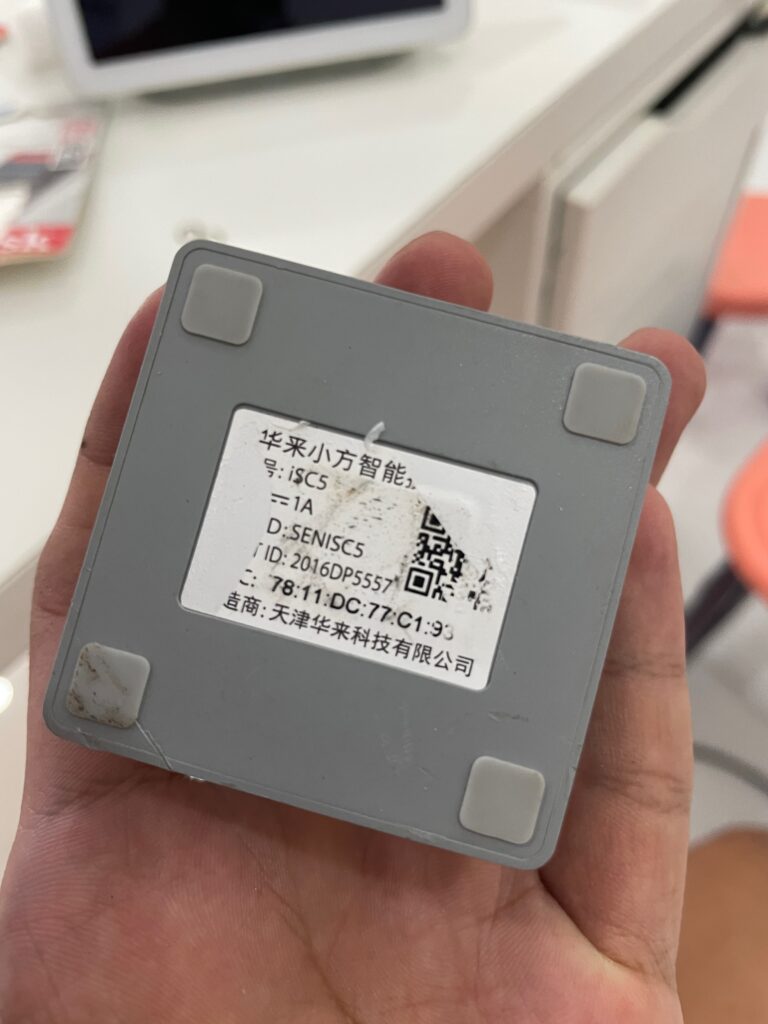
I have a Wyze cam v2 that has a blurry sensor. I tried replacing the whole camera module from a Xiaomi Xiaofang 1S. It worked.

Two disassembled camera circuit boards side by side to demonstrate swapping a sensor module between devices. Two camera modules side by side, showing a Wyze Cam v2 and a Xiaomi Xiaofang 1S module for comparison. A person holds the back of a Xiaofang 1S camera module with a label showing its model and serial number. A disassembled camera module from a Xiaomi Xiaofang 1S being used to replace a Wyze Cam v2 sensor. A smartphone screen showing a live video feed from an office security camera.

https://leo.leung.xyz/wiki/Wyze_Cam

Related: USB to Ethernet Adaptors: Chipset Notes for macOS and Proxmox and Enterprise-grade CCTV on a Consumer-grade Hardware.
Xpenology NVR - DVA3219 + GTX 1060 Works

/CCTV/#xpenology

I continued with my Xpenology Experiments when I remember that there was an NVR that’s using an older version of Nvidia GPU: DVA3219. It’s officially paired with GTX 1050Ti which is the same generation of the GPU I have in hand.

I checked if any of the bootloaders have support with DVA3219 platform, arpl-i18n does under experimental platforms.

I quickly tried it up again. The installation had no issues. It detected the GPU just like with DVA3221. But I’m still not sure if any AI tasks will work.

Synology Control Panel showing DVA3219 hardware details and a GeForce GTX 1060 GPU detected in the Info Center.

I installed Surveillance Station, added 1 IP camera and setup AI tasks.

Surveillance Station interface showing a successful face recognition task with detected events.

Facial Recognition works!

Synology Surveillance Station interface showing active Object Detection, Intrusion Detection, and People Counting tasks.
Synology Surveillance Station interface showing successful detection results for people and vehicle detection tasks.

Object Detection works!

Intrusion Detection and People Counting did not work though.

A Surveillance Station error message shows that the limit of concurrent AI tasks has been reached.

Another interesting thing is I can run up to 3 AI tasks at the same time. Having AI tasks enabled directly reflects in GPU utilization.

Resource Monitor UI showing high GPU utilization during AI tasks on an Xpenology NVR.

Power Consumption

No AI tasks~50w
Facial Recognition Only~100w
Object Detection Only~80w
Facial Recognition + Object Detection~100w

Running this machine 24/7 would roughly translates to around 700 pesos per month (@ 10 pesos/kw)

Where to use: CRYSTALDIN-NAS

It’s fun that I found a use for this GPU. I got it for free but I really have no use for it.

I have a server running at CRYSTALDRIN that has a free x16 PCIe port. It’s running Proxmox. I can set up a virtual DVA3219 with GPU Passthrough and have this up and running.

I still have reservation with the monthly cost. An alternative is to use a Intel-based GPU which would only use around 20w (80% less, around 144 pesos per month).

Let’s see!

Related: Enterprise-grade CCTV on a Consumer-grade Hardware and Enable IOMMU on Proxmox, Plus Real IOMMU Groups.

Xpenology NVR Experiments: DVA1622 and DVA3221

/CCTV/#xpenology

This all started when I was looking if there’s a new way to “trick” DSM’s Surveillance Station to increase camera limit.

I stumbled a post to just use an DVA1622 (NVR-specific NAS) and I’ll automatically get 8 licenses without resorting to use an old Surveillance Station apk.

When I checked Xpenology forum, I saw there’s an active development to run DVA1622 loader.

I’ve read through the thread to get a sense on compatibility. I tried tinycore-redpill first because it’s what I’ve used a couple of years back.

Terminal window showing a failed boot loader creation error due to no space left on device.

I could not finish the setup process though because of “out of storage” error when building the boot loader. I saw there was an effort to make the bootloader more streamlined. Literally just a set of menus to select what you want to happen and it will do everything for you. I used ARPL for my second attempt.

Easy mode: ARPL

I created a boot disk with ARPL. This is my first time using ARPL. I’m used to type ./rploader.sh commands from tinycore-redpill. The experience with ARPL was just delightful. No messing around with different commands.

After selecting “Boot loader”, it just works.

The DSM 7.2 welcome screen after a successful ARPL boot loader installation for an Xpenology NVR experiment.

It felt super exciting making this work. I remember my college days when we could not afford a Macbook, and being able boot MacOS on my Compaq laptop, and actually do work on it. It felt amazing.

DVA1622 and Intel GPU

I chose DVA1622 as my platform to have the 8 camera license built-in. However, once done with the initial setup, the license was 0.

It turns out the issue is wrong serial number pattern. ARPL I used was not updated to generate the correct serial pattern. I rebooted to ARPL again, updated the serial number and it worked.

License management screen showing 8 total licenses with 4 used and 4 available on a DVA1622 platform.

AI tasks

The next thing I wanted to try if it will work are AI tasks. DVA1622 has a new feature that can do Facial Recognition and Video Analytics (intrusion detection, read license plates, etc). It uses the Intel iGPU.

It’s supposed to be for Intel HD Graphics 630. The machine I’m testing it on only has Intel HD Graphics 520, but it uses the same i915.ko driver.

It worked!

DVA3221 and Nvidia GTX 1060 3gb

DVA3221 is a hardware that has an Intel Atom CPU and GTX 1650 GPU. It allows more up to 12 AI tasks (Facial Recognition and Video Analytics).

I do not have GTX 1650, but I have a GTX 1060 lying around. I was curious if it will work because technically Synology uses the same Linux drivers for Nvidia as everybody else.

An open computer case containing an Intel G4560 CPU and an Nvidia GTX 1060 3gb GPU for Xpenology testing.
Test server with Intel G4560 and Nvidia GTX 1060 3gb
Synology Control Panel showing a GeForce GTX 1060 3GB GPU detected under the hardware information.

The installation was straightforward. Super surprised and excited that GTX 1060 showed up in control panel.

I setup Facial Recognition and Video Analytics task. I monitored GPU processes using nvidia-smi. I can see synofaced and synodvad processing. After a couple of tries, nothing was being detected.

A Deep Video Analytics interface showing an Office Gate Restrict task with no detection results.
Video Analytics task not working
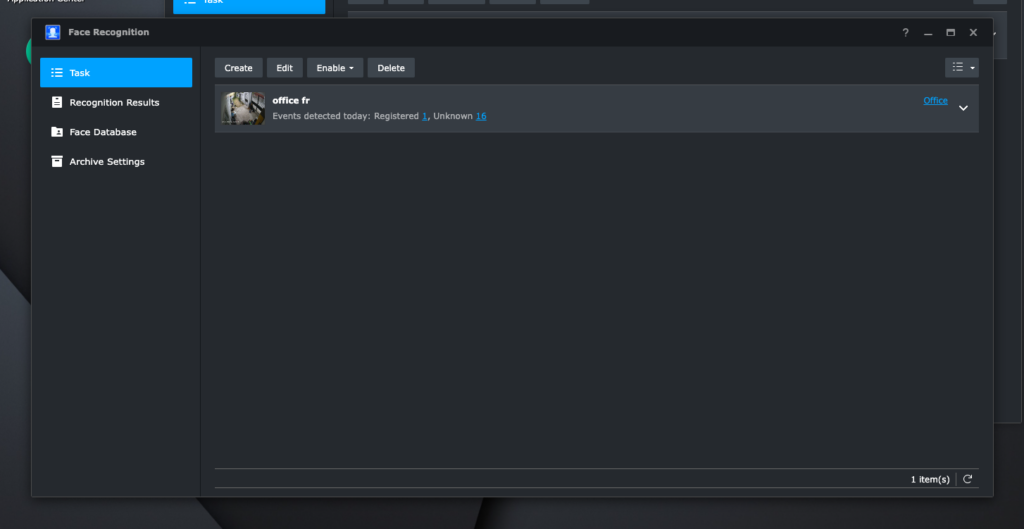
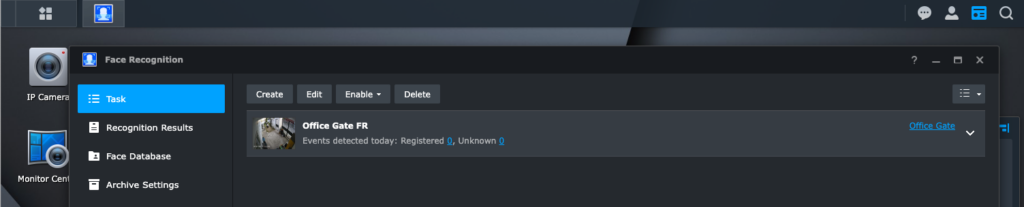
Face Recognition interface in a surveillance software UI showing an Office Gate FR task.
Facial Recognition task not working
A terminal screenshot of nvidia-smi showing a GeForce GTX 1060 with synofaced and synodvad processes running.

TLDR: Despite having the GPU being detected, it’s not working with AI tasks.

NVENC will work though. For packages (e.g. Plex) that has the feature to enable NVENC, it will work.

AI Tasks Compatibility

I tried AI tasks on a couple more hardware I have. Here’s what I found out:

Facial RecognitionVideo Analytics
Intel HD Graphics 630✅✅
Intel HD Graphics 520✅✅
Intel HD Graphics 4200 (from G1840)❌❌
Intel HD Graphics 610 (from G4560)❌❌
Nvidia GTX 1060 3gb❌❌

Related: Xpenology NVR - DVA3219 + GTX 1060 Works and Enterprise-grade CCTV on a Consumer-grade Hardware.