#xpenology

3 posts.

Xpenology DSM 7.2 on Proxmox: Boot Disk, USB Bootloader and AME Patch

/ Nas /

In preparation for setting up and upgrading CRYSTALDRIN server to DSM 7.2, I tested out what’s the new process for creating an Xpenology VM in Proxmox.

I remember it being really complicated that involves a lot of commands.

With the recent development of interactive bootloaders, it was very easy now.

These are the notes I kept while doing it, in the order I needed them.

Create a boot disk

Step-by-step guide to create a boot disk for booting Xpenology bootloaders.

  1. Download the bootloader you intend to use.
  2. Extract the .gz to .img.
  3. Plug-in the USB flash drive.
  4. In a Mac terminal, run diskutil list.
  5. Note the disk number of of the USB flash drive in the list.
  6. Run sudo dd if=arpl.img of=/dev/rdisk# bs=1m.
    • Replace # with the disk number.

Xpenology DSM bootloader list:

Mount the bootloader as a USB in Proxmox

In a VM, the bootloader image can be attached as a virtual USB disk instead.

The special configuration required for the virtual machine that simulates the U disk:

  1. Select the model as q35.
  2. Enable SeaBIOS, or select UEFI and enter BIOS to turn off secure boot.
  3. Cancel all Boot Order under Options.
  4. Edit /etc/pve/qemu-server/101.conf.

Add the following line in (note to modify the mirror path):

args: -device 'nec-usb-xhci,id=usb-bus0,multifunction=on' -drive 'file=/path/to/arpl-sa6400.img,media=disk,format=raw,if=none,id=drive-disk-bootloader' -device 'usb-storage,bus=usb-bus0.0,port=1,drive=drive-disk-bootloader,id=usb-disk-bootloader,bootindex=999,removable=on'

Source: https://blog.jim.plus/blog/post/jim/synology-sa6400-with-i915

Patch AME for HEVC

AME patch is needed if you want support for HEVC encoding/decoding.

  1. Connect to SSH.
  2. Create the patch (below).
  3. Run sudo python ame.py.
import hashlib
import os

r = ['669066909066906690', 'B801000000', '30']
s = [(0x1F28, 0), (0x48F5, 1), (0x4921, 1), (0x4953, 1), (0x4975, 1), (0x9AC8, 2)]
prefix = '/var/packages/CodecPack/target/usr'
so = prefix + '/lib/libsynoame-license.so'

print("Patching")
with open(so, 'r+b') as fh:
    full = fh.read()
    if hashlib.md5(full).digest().hex() != 'fcc1084f4eadcf5855e6e8494fb79e23':
        print("MD5 mismatch")
        exit(1)
    for x in s:
        fh.seek(x[0] + 0x8000, 0)
        fh.write(bytes.fromhex(r[x[1]]))

lic = '/usr/syno/etc/license/data/ame/offline_license.json'
os.makedirs(os.path.dirname(lic), exist_ok=True)
with open(lic, 'w') as licf:
    licf.write('[{"appType": 14, "appName": "ame", "follow": ["device"], "server_time": 1666000000, "registered_at": 1651000000, "expireTime": 0, "status": "valid", "firstActTime": 1651000001, "extension_gid": null, "licenseCode": "0", "duration": 1576800000, "attribute": {"codec": "hevc", "type": "free"}, "licenseContent": 1}, {"appType": 14, "appName": "ame", "follow": ["device"], "server_time": 1666000000, "registered_at": 1651000000, "expireTime": 0, "status": "valid", "firstActTime": 1651000001, "extension_gid": null, "licenseCode": "0", "duration": 1576800000, "attribute": {"codec": "aac", "type": "free"}, "licenseContent": 1}]')

print("Checking whether patch is successful...")
ret = os.system(prefix + "/bin/synoame-bin-check-license")
if ret == 0:
    print("Successful, updating codecs...")
    os.system(prefix + "/bin/synoame-bin-auto-install-needed-codec")
    print("Done")
else:
    print(f"Patch is unsuccessful, retcode = {ret}")

7.2:

import hashlib
import os

r = ['669066909066906690', 'B801000000', '30']
s = [(0x3718, 0), (0x60A5, 1), (0x60D1, 1), (0x6111, 1), (0x6137, 1), (0xB5F0, 2)]
prefix = '/var/packages/CodecPack/target/usr'
so = prefix + '/lib/libsynoame-license.so'

print("Patching")
with open(so, 'r+b') as fh:
    full = fh.read()
    if hashlib.md5(full).digest().hex() != '09e3adeafe85b353c9427d93ef0185e9':
        print("MD5 mismatch")
        exit(1)
    for x in s:
        fh.seek(x[0] + 0x8000, 0)
        fh.write(bytes.fromhex(r[x[1]]))

lic = '/usr/syno/etc/license/data/ame/offline_license.json'
os.makedirs(os.path.dirname(lic), exist_ok=True)
with open(lic, 'w') as licf:
    licf.write('[{"attribute": {"codec": "hevc", "type": "free"}, "status": "valid", "extension_gid": null, "expireTime": 0, "appName": "ame", "follow": ["device"], "duration": 1576800000, "appType": 14, "licenseContent": 1, "registered_at": 1649315995, "server_time": 1685421618, "firstActTime": 1649315995, "licenseCode": "0"}, {"attribute": {"codec": "aac", "type": "free"}, "status": "valid", "extension_gid": null, "expireTime": 0, "appName": "ame", "follow": ["device"], "duration": 1576800000, "appType": 14, "licenseContent": 1, "registered_at": 1649315995, "server_time": 1685421618, "firstActTime": 1649315995, "licenseCode": "0"}]')

print("Checking whether patch is successful...")
ret = os.system(prefix + "/bin/synoame-bin-check-license")
if ret == 0:
    print("Successful, updating codecs...")
    os.system(prefix + "/bin/synoame-bin-auto-install-needed-codec")
    print("Done")
else:
    print(f"Patch is unsuccessful, retcode = {ret}")

https://xpenology.com/forum/topic/65643-ame-30-patcher/

Related: Xpenology NVR Experiments: DVA1622 and DVA3221 and Enable IOMMU on Proxmox, Plus Real IOMMU Groups.

Xpenology NVR - DVA3219 + GTX 1060 Works

/ Cctv /

I continued with my Xpenology Experiments when I remember that there was an NVR that’s using an older version of Nvidia GPU: DVA3219. It’s officially paired with GTX 1050Ti which is the same generation of the GPU I have in hand.

I checked if any of the bootloaders have support with DVA3219 platform, arpl-i18n does under experimental platforms.

I quickly tried it up again. The installation had no issues. It detected the GPU just like with DVA3221. But I’m still not sure if any AI tasks will work.

Synology Control Panel showing DVA3219 hardware details and a GeForce GTX 1060 GPU detected in the Info Center.

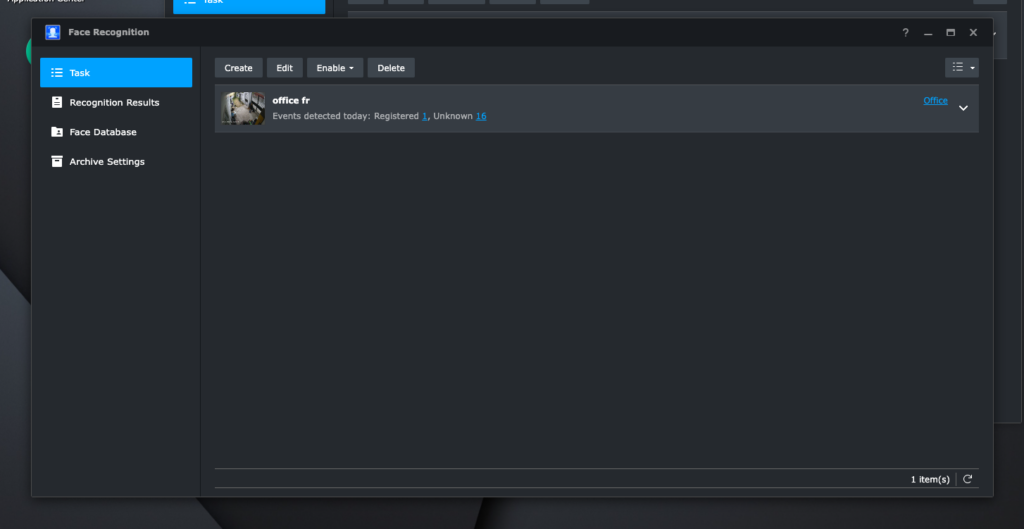
I installed Surveillance Station, added 1 IP camera and setup AI tasks.

Surveillance Station interface showing a successful face recognition task with detected events.

Facial Recognition works!

Synology Surveillance Station interface showing active Object Detection, Intrusion Detection, and People Counting tasks.
Synology Surveillance Station interface showing successful detection results for people and vehicle detection tasks.

Object Detection works!

Intrusion Detection and People Counting did not work though.

A Surveillance Station error message shows that the limit of concurrent AI tasks has been reached.

Another interesting thing is I can run up to 3 AI tasks at the same time. Having AI tasks enabled directly reflects in GPU utilization.

Resource Monitor UI showing high GPU utilization during AI tasks on an Xpenology NVR.

Power Consumption

No AI tasks~50w
Facial Recognition Only~100w
Object Detection Only~80w
Facial Recognition + Object Detection~100w

Running this machine 24/7 would roughly translates to around 700 pesos per month (@ 10 pesos/kw)

Where to use: CRYSTALDIN-NAS

It’s fun that I found a use for this GPU. I got it for free but I really have no use for it.

I have a server running at CRYSTALDRIN that has a free x16 PCIe port. It’s running Proxmox. I can set up a virtual DVA3219 with GPU Passthrough and have this up and running.

I still have reservation with the monthly cost. An alternative is to use a Intel-based GPU which would only use around 20w (80% less, around 144 pesos per month).

Let’s see!

Related: Enterprise-grade CCTV on a Consumer-grade Hardware and Enable IOMMU on Proxmox, Plus Real IOMMU Groups.

Xpenology NVR Experiments: DVA1622 and DVA3221

/ Cctv /

This all started when I was looking if there’s a new way to “trick” DSM’s Surveillance Station to increase camera limit.

I stumbled a post to just use an DVA1622 (NVR-specific NAS) and I’ll automatically get 8 licenses without resorting to use an old Surveillance Station apk.

When I checked Xpenology forum, I saw there’s an active development to run DVA1622 loader.

I’ve read through the thread to get a sense on compatibility. I tried tinycore-redpill first because it’s what I’ve used a couple of years back.

Terminal window showing a failed boot loader creation error due to no space left on device.

I could not finish the setup process though because of “out of storage” error when building the boot loader. I saw there was an effort to make the bootloader more streamlined. Literally just a set of menus to select what you want to happen and it will do everything for you. I used ARPL for my second attempt.

Easy mode: ARPL

I created a boot disk with ARPL. This is my first time using ARPL. I’m used to type ./rploader.sh commands from tinycore-redpill. The experience with ARPL was just delightful. No messing around with different commands.

After selecting “Boot loader”, it just works.

The DSM 7.2 welcome screen after a successful ARPL boot loader installation for an Xpenology NVR experiment.

It felt super exciting making this work. I remember my college days when we could not afford a Macbook, and being able boot MacOS on my Compaq laptop, and actually do work on it. It felt amazing.

DVA1622 and Intel GPU

I chose DVA1622 as my platform to have the 8 camera license built-in. However, once done with the initial setup, the license was 0.

It turns out the issue is wrong serial number pattern. ARPL I used was not updated to generate the correct serial pattern. I rebooted to ARPL again, updated the serial number and it worked.

License management screen showing 8 total licenses with 4 used and 4 available on a DVA1622 platform.

AI tasks

The next thing I wanted to try if it will work are AI tasks. DVA1622 has a new feature that can do Facial Recognition and Video Analytics (intrusion detection, read license plates, etc). It uses the Intel iGPU.

It’s supposed to be for Intel HD Graphics 630. The machine I’m testing it on only has Intel HD Graphics 520, but it uses the same i915.ko driver.

It worked!

DVA3221 and Nvidia GTX 1060 3gb

DVA3221 is a hardware that has an Intel Atom CPU and GTX 1650 GPU. It allows more up to 12 AI tasks (Facial Recognition and Video Analytics).

I do not have GTX 1650, but I have a GTX 1060 lying around. I was curious if it will work because technically Synology uses the same Linux drivers for Nvidia as everybody else.

An open computer case containing an Intel G4560 CPU and an Nvidia GTX 1060 3gb GPU for Xpenology testing.
Test server with Intel G4560 and Nvidia GTX 1060 3gb
Synology Control Panel showing a GeForce GTX 1060 3GB GPU detected under the hardware information.

The installation was straightforward. Super surprised and excited that GTX 1060 showed up in control panel.

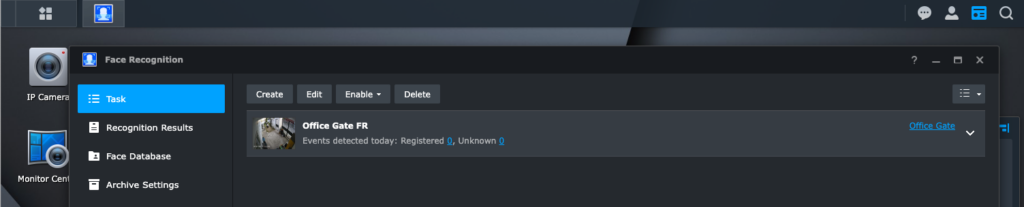
I setup Facial Recognition and Video Analytics task. I monitored GPU processes using nvidia-smi. I can see synofaced and synodvad processing. After a couple of tries, nothing was being detected.

A Deep Video Analytics interface showing an Office Gate Restrict task with no detection results.
Video Analytics task not working
Face Recognition interface in a surveillance software UI showing an Office Gate FR task.
Facial Recognition task not working
A terminal screenshot of nvidia-smi showing a GeForce GTX 1060 with synofaced and synodvad processes running.

TLDR: Despite having the GPU being detected, it’s not working with AI tasks.

NVENC will work though. For packages (e.g. Plex) that has the feature to enable NVENC, it will work.

AI Tasks Compatibility

I tried AI tasks on a couple more hardware I have. Here’s what I found out:

Facial RecognitionVideo Analytics
Intel HD Graphics 630✅✅
Intel HD Graphics 520✅✅
Intel HD Graphics 4200 (from G1840)❌❌
Intel HD Graphics 610 (from G4560)❌❌
Nvidia GTX 1060 3gb❌❌

Related: Xpenology NVR - DVA3219 + GTX 1060 Works and Enterprise-grade CCTV on a Consumer-grade Hardware.