#self-hosting

14 posts.

Exploring and Migrating to OpenResty

/
OpenResty using a Lua routing table to send requests to PHP-FPM sockets for different PHP versions

I have an old CyberPanel instance that still hosts live sites. Some have been running for more than ten years. They’re non-critical, and the server kept working, so I kept putting off maintaining it.

Then php2shell happened. After dealing with it at work, I needed to check my own server too. Most of the sites were on PHP versions that no longer receive security fixes.

I also wanted to try something. A friend mentioned using OpenResty with Lua to route requests to PHP-FPM sockets. I didn’t know the details of their setup, but I was curious if I could do something similar.

Getting the sites working first

I upgraded the sites while they were still on CyberPanel and LiteSpeed. That way, if something broke later, I would have fewer things to check.

Old WordPress installs needed core and plugin updates before they could run on PHP 8. A custom theme had an unquoted constant, a plugin used create_function(), and a small Laravel app needed a framework upgrade.

I also found web shells, a backdoor plugin, and forgotten copies of old sites inside live web roots. The sites were responding fine, but there was a lot I hadn’t been seeing.

One config for the sites

OpenResty is nginx with Lua support. The idea is to let Lua look up the hostname and tell nginx which directory and PHP-FPM socket to use.

Each site has an entry in sites.json:

{
  "example.com": {
    "root": "/home/example.com/public_html",
    "user": "example",
    "kind": "php",
    "cert": "example.com",
    "https": true,
    "php": "8.4"
  }
}

Lua keeps the routes in memory. It selects the certificate during the TLS handshake, then uses the request’s hostname to choose the site. nginx serves static files directly and passes PHP requests to the right FPM socket.
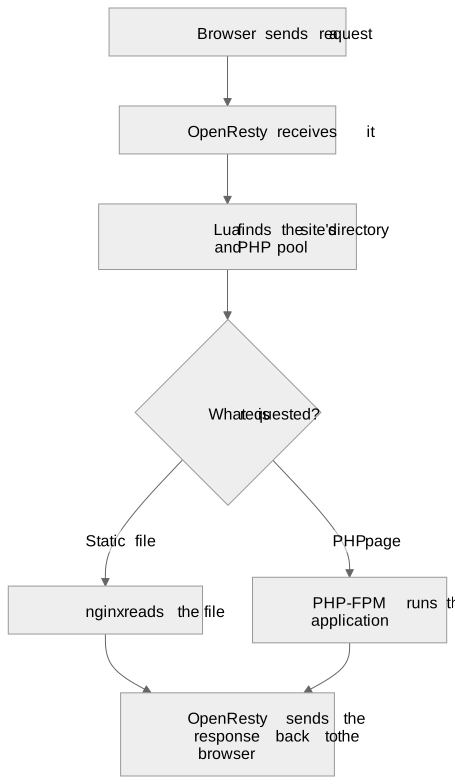
Request lifecycle from the browser through OpenResty and back

Each Linux account gets its own PHP-FPM pool. Sites under the same account still share permissions, so I moved the contracts app into its own user and pool. The pools use ondemand so workers stop when idle. Useful on a small VPS.

The config also supports choosing a PHP version per site, though I’ve only installed and tested 8.4 so far. Databases mostly stayed as they were: local MariaDB, and SQLite for the contracts app.

CyberPanel and LiteSpeed are gone now. Lua looks up the hostname, nginx serves the files, and PHP-FPM runs the application. I can follow a request from its hostname to a directory and a PHP socket. Pretty happy to have this working.

Live configuration updates

I wanted to add sites or change their PHP sockets without reloading OpenResty.

A small root-owned publisher checks sites.json and the certificate files, validates the changes, and writes a complete snapshot. The Lua workers pick it up and replace their in-memory routes and certificates together. The snapshot is private because it contains TLS keys; the PHP accounts can’t read it.

This implementation uses one-second polling in the publisher and workers, so updates normally take about two seconds. Requests use the in-memory tables. If an update is invalid, the last valid configuration keeps working.

I tested adding and removing a hostname, switching PHP sockets, and replacing a certificate. The OpenResty master and worker process IDs stayed the same throughout.

Next steps

  • Try Linux inotify events instead of polling, so configuration changes can notify the workers directly.
  • Use OpenResty as a reverse proxy across my homelab sites, with a primary and secondary site. Start with manual failover.
  • Move files and uploads to NFS shares with replication between sites.
  • Add MySQL primary/replica replication.
  • Keep PHP-FPM workers warm while retaining separate pools per account. More RAM, but less startup delay.

For next time!

QR Check-in Auto-Printer for WordCamp PH

QR check-in auto-printer setup at WordCamp Philippines

A couple of weeks before WordCamp Philippines, Arvin John and Jhim came over to my office to co-work, flash a laptop BIOS (to remove password), and see me rehearse my upcoming talk (didn’t happen).

At some point, Jhim mentioned in passing that he wanted to try automatically printing attendee badges during QR check-in.

I happened to have a similar project for an inventory system. I knew immediately that it was possible, and I was pretty sure we could pull it off.

It got me so excited that right then and there, based on my existing project and code, I made him a proof-of-concept using a smaller printer that I have available around.

The idea was: I would expose an HTTP endpoint, and his QR check-in code would send the attendee details as GET parameters. My side would take care of the actual printing.

We had to do it this way because

  • It’s simple, it will be just a link in his QR check-in code with pre-filled GET parameters
  • No printer drivers to mess around with
  • We knew we probably would not be able to test everything together in person.

For remote testing, I exposed the printer endpoint at printernijhim.aragon.ph. Jhim could trigger a print from wherever he was, and a sticker would come out of the printer sitting in my office.

Jhim triggering print at his house.

I have been very fascinated with thermal printers and the cheapness of the sticker papers available. I was even willing to buy the printer and stickers if the organizer don’t have a budget for, just to try it out in “production”. I really need an excuse for practical use before I purchase anything.

Cost

ItemPrice
A6 Waybill Printer OC-9260₱2,399
80x50cm Thermal Label Stickers, 1000 pcs₱169
Sticker Holder₱146
Fujitsu Lifebook Q509 (tablet, printer server)₱2,199

The organizers also bought another set of printer and stickers, which is ideal in case one printer malfunctions.

The tablet doesn’t really count toward this project. I bought it a couple of months back for another purpose, on a Shopee sale. I just happened to have it lying around.

Getting it event-ready

The only thing I asked Jhim to add to his check-in system was a configurable printer URL. That way, we could change where print requests were sent without changing actual code during the event.

On my side, I used a tablet with a USB-A port connected directly to the printer.

It runs Ubuntu, CUPS, and a small web server.

I configured it so that when the tablet boots, it automatically:

  • logs in
  • starts the print server
  • opens Firefox in kiosk mode
  • waits for HTTP GET requests

The goal was for the whole thing to be basically plug and play on event day.

On the first day, I stayed around the registration area to make sure everything was working on the printer side.

On the second day, I did not have the head space to check because it’s the day I will present. It still worked.

Pulled it off for 400+ attendees

Did I mention that I’m sure it will work? It did! It was nice seeing badges around with printed tags.

Scan, check-in, badge prints. Live at registration. Video provided by Jhim.

There were a couple of things we can improve, though that’s for version 2.

Version 2

For version 2, I think the tablet itself could be the QR code scanner. It has a webcam, and it can be configured to be always-on.

We could build a small local backend where CampTix attendee data is uploaded before the event. At that point, ticket sales are mostly done anyway.

The flow could then be:

  • QR scan
  • Check-in attendee, record locally
  • Print badge

Everything entirely on the tablet. The biggest advantage is that registration would have no internet dependency at all. We could also deploy multiple tablets independent of each other (horizontal scaling!).

After the event, we could sync the check-in data back to CampTix.

For the next event!

-

The QR check-in and automatic printing idea was Jhim’s, I was just a big enabler. I just enjoy these kind of projects.

Jhim wrote up the check-in system from his side: Building a QR Check-in System for WordCamp Philippines.

Setting up Traefik as a Reverse Proxy in Proxmox

I wanted one place to receive requests for my homelab services and send each request to the right machine. Traefik now does that job in an LXC on Proxmox. It replaced Nginx Proxy Manager in my setup.

This is the setup that worked for me: install Traefik with the Proxmox community script, keep the main settings in one file, and add a small file for each service. I’ll use nvr.example.com pointing to an NVR at 192.168.0.155:5000 as the example. Replace those with your own domain and service address.

Before you start

For the Let’s Encrypt method in this guide, you need:

  • A domain you control, with a DNS record for the hostname pointing to your public IP.
  • Ports 80 and 443 forwarded from your router to the Traefik LXC’s IP address.
  • A service that Traefik can reach from the LXC, such as http://192.168.0.155:5000.

Let’s Encrypt must be able to reach Traefik on port 80 for the HTTP-01 challenge. If that isn’t possible in your network, use a different challenge method; the configuration below won’t issue a certificate on its own.

1. Install Traefik in an LXC

Run the command shown on the Traefik community script page in the Proxmox host shell, not inside an existing container:

var_os='debian' bash -c "$(curl -fsSL https://raw.githubusercontent.com/community-scripts/ProxmoxVE/main/ct/traefik.sh)"
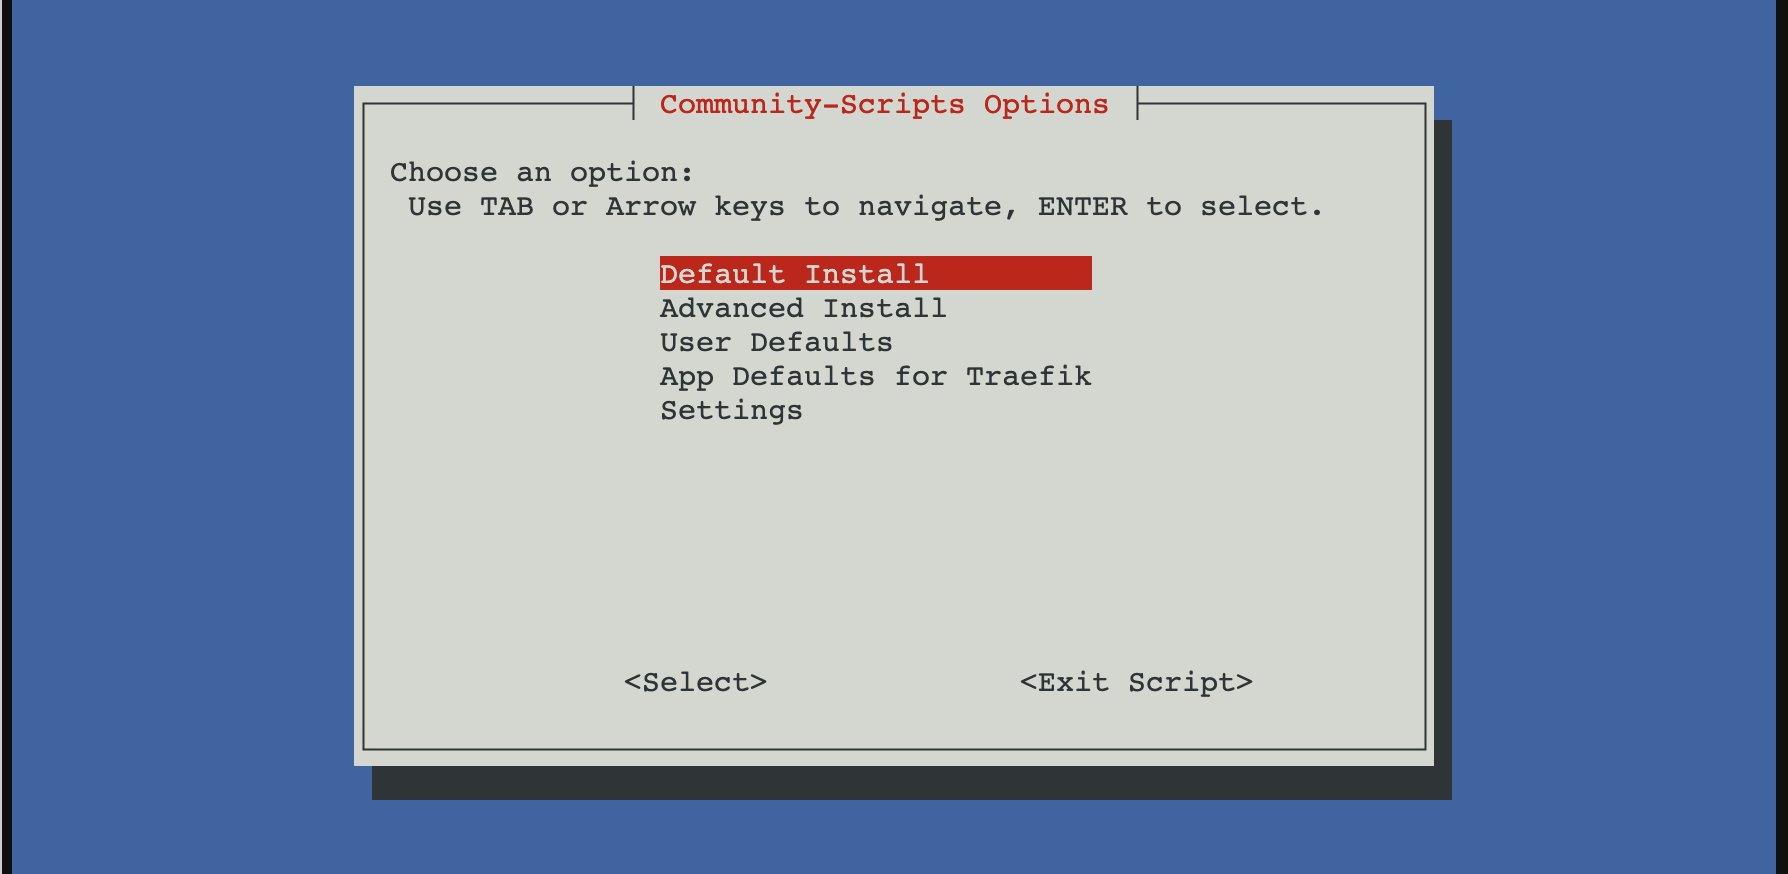
Proxmox community script options for Traefik

The script creates the LXC and installs Traefik. Note the LXC’s IP address. Inside the container, the main configuration file is /etc/traefik/traefik.yaml, and Traefik runs as a systemd service.

2. Set up Traefik’s main configuration

Traefik has two kinds of configuration. The static configuration tells it which ports to listen on, where to load route files, and how to request certificates. The dynamic configuration describes which hostname goes to which service.

Merge these settings into /etc/traefik/traefik.yaml inside the LXC. Keep any settings from the install script that you still need, and replace the example email address:

entryPoints:
  web:
    address: ":80"
  websecure:
    address: ":443"

providers:
  file:
    directory: /etc/traefik/conf.d/
    watch: true

certificatesResolvers:
  letsencrypt:
    acme:
      email: "[email protected]"
      storage: /etc/traefik/ssl/acme.json
      httpChallenge:
        entryPoint: web

Create /etc/traefik/conf.d/ and /etc/traefik/ssl/ if they don’t exist. Make sure Traefik can write to the ACME storage path. The path in the configuration has to match the file Traefik uses; I once had a typo there and spent time looking for a certificate in the wrong place.

The web entry point receives HTTP traffic on port 80. The websecure entry point receives HTTPS traffic on port 443. Traefik watches conf.d so route changes can be loaded from separate files.

3. Add a route for one service

Create /etc/traefik/conf.d/nvr.yaml:

http:
  routers:
    nvr:
      rule: "Host(`nvr.example.com`)"
      entryPoints:
        - websecure
      service: nvr
      tls:
        certResolver: letsencrypt

  services:
    nvr:
      loadBalancer:
        servers:
          - url: "http://192.168.0.155:5000"

The router matches requests for nvr.example.com on HTTPS. The service is where Traefik sends them. certResolver: letsencrypt tells Traefik to request and manage a certificate for the hostname in the router rule. Defining the resolver in the main file isn’t enough; a TLS router must use it.

Repeat this pattern in another file for each service, changing the router name, hostname, service name, and backend URL.

4. Restart and test

Restart Traefik after changing its main configuration:

systemctl restart traefik
systemctl status traefik

Then visit https://nvr.example.com from outside your network. The request should reach your router, pass to the Traefik LXC, match the nvr router, and reach the NVR. Traefik requests the certificate when it needs one for the matching TLS router; an empty acme.json immediately after startup doesn’t by itself mean the setup is broken.

If the page doesn’t load, follow the request in that same order:

  1. Does the hostname resolve to your public IP?
  2. Do ports 80 and 443 reach the Traefik LXC?
  3. Can the LXC reach the backend URL directly?
  4. Did Traefik load the route file, and does its Host rule match the hostname you visited?

Read the service logs while testing:

journalctl -u traefik -f

I temporarily set log.level: DEBUG in the main configuration when I needed more detail. One useful error was HTTP challenge is not enabled, which pointed back to the missing httpChallenge setting. Remove the extra logging once you’ve found the problem.

Optional: redirect HTTP to HTTPS

I left redirects out while getting certificate issuance working so there was one less setting to debug. If you want HTTP requests to redirect to HTTPS, Traefik supports an entry point redirect:

entryPoints:
  web:
    address: ":80"
    http:
      redirections:
        entryPoint:
          to: websecure
          scheme: https
  websecure:
    address: ":443"

Merge that into your existing entryPoints section rather than adding a second one. I previously thought this kind of redirect broke HTTP-01. Traefik’s ACME documentation says the redirect is compatible with the challenge. The real requirements are that port 80 reaches Traefik and that the resolver has httpChallenge.entryPoint set to web.

For more detail on route files, see Traefik’s file provider documentation.

Related: Deploying Kubernetes using Terraform, Proxmox, Ansible, and K3s and Cloning a Tailscale VM: Fixing the Duplicate Node Key.

FauxPilot: Self-hosted GitHub Copilot

/ Self-hosting /

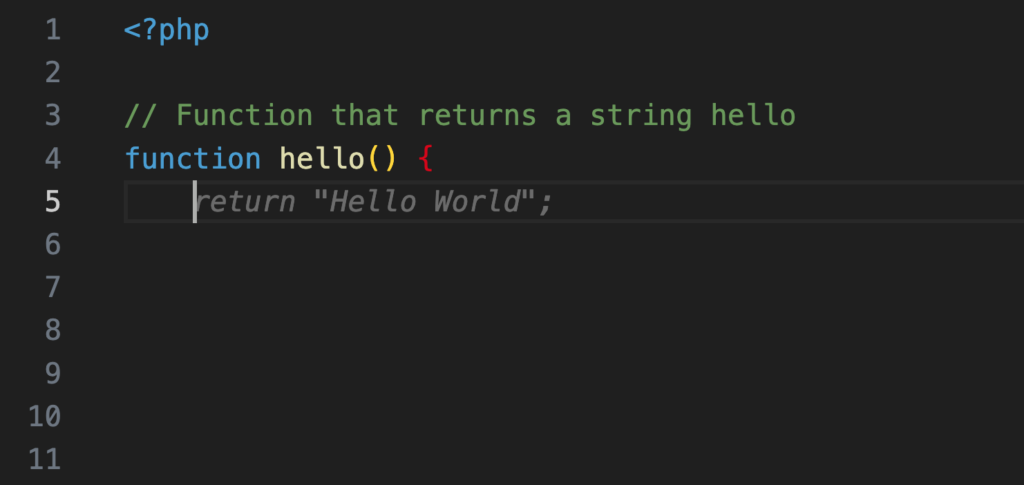
A code editor showing a PHP function being automatically completed by an AI assistant.

I’ve been trialing GitHub Copilot for a couple of weeks now. I can say that it’s well worth it especially when writing code from a blank slate. It outputs code blocks that help my brain process more quickly.

Its output rarely works as-is, but it only needs minimal tweaking.

It’s another subscription though, and I try to limit my monthly expenses to a minimum. It’s a nice-to-have, but not a necessary-to-have with the amount of coding I do at the moment.

When I was migrating my old server, I saw in the Vultr Marketplace FauxPilot. It turned out it’s an open-source alternative to GitHub Copilot server using Salesforce CodeGen.

I just had to try it.

Requirements

An Nvidia Tesla P4 GPU installed in a computer server to meet the hardware requirements for FauxPilot.

The only physical requirement is an Nvidia GPU with CUDA support (I have a Tesla P4 ✅).

The rest are just software to install:

Server Installation

I use Ubuntu 20.04 as my base OS. From a fresh install, here’s what I needed to do to run FauxPilot.

  1. Install Docker
curl https://get.docker.com | sh \
  && sudo systemctl --now enable docker
  1. Install Nvidia Container Toolkit
distribution=$(. /etc/os-release;echo $ID$VERSION_ID) \
  && curl -fsSL https://nvidia.github.io/libnvidia-container/gpgkey \
  | sudo gpg --dearmor -o /usr/share/keyrings/nvidia-container-toolkit-keyring.gpg \
  && curl -s -L https://nvidia.github.io/libnvidia-container/$distribution/libnvidia-container.list \
  | sed 's#deb https://#deb [signed-by=/usr/share/keyrings/nvidia-container-toolkit-keyring.gpg] https://#g' \
  | sudo tee /etc/apt/sources.list.d/nvidia-container-toolkit.list

sudo apt-get update
sudo apt-get install -y nvidia-container-toolkit
sudo nvidia-ctk runtime configure --runtime=docker
sudo systemctl restart docker
  1. Install Nvidia CUDA drivers
wget https://developer.download.nvidia.com/compute/cuda/repos/ubuntu2004/x86_64/cuda-keyring_1.1-1_all.deb
sudo dpkg -i cuda-keyring_1.1-1_all.deb
sudo apt-get update
sudo apt-get -y install --no-install-recommends cuda
sudo apt-get -y install nvidia-driver-535

Make sure the drivers are properly installed by running nvidia-smi.

Terminal output of the nvidia-smi command showing a Tesla P4 GPU with drivers and CUDA version successfully installed.

  1. Clone FauxPilot repo
git clone https://github.com/fauxpilot/fauxpilot.git
cd fauxpilot
  1. Run FauxPilot setup
sudo bash ./setup.sh

Terminal window showing the FauxPilot setup script process and a list of available model options.

I chose codegen-2B-multi because my GPU only has 8GB VRAM, and I’m coding in PHP. Higher parameter models require more VRAM and RAM.

  1. Launch FauxPilot
sudo bash ./launch.sh

Demo video: /media/homelab/2023/08/Screen-Recording-2023-08-24-at-22.00.05.mov

Test if the server is working:

curl -s -H "Accept: application/json" \
  -H "Content-type: application/json" \
  -X POST \
  -d '{"prompt":"def hello","max_tokens":100,"temperature":0.1,"stop":["\n\n"]}' \
  http://localhost:5000/v1/engines/codegen/completions | jq

Response should be:

{
  "id": "cmpl-OCButmOAbNedOMOxjPc0v9skuLdk7",
  "model": "codegen",
  "object": "text_completion",
  "created": 1692885668,
  "choices": [
    {
      "text": "(self):\n return \"Hello World!\"",
      "index": 0,
      "finish_reason": "stop",
      "logprobs": null
    }
  ],
  "usage": {
    "completion_tokens": 11,
    "prompt_tokens": 2,
    "total_tokens": 13
  }
}

Client Setup

VS Code settings showing the Fauxpilot Server configuration field being updated with a local IP address.

Now that I have a working server, I need to setup my client. There’s a VSCode extension called FauxPilot. The only configuration change needed is pointing to the server address. After that, it works right away.

Demo video:

The suggestions quality is very far from GitHub Copilot. But at least it works!

There are a lot of factors why it’s underperforming. Maybe it’s the model itself, or the size of the model I chose, limited context, difference in training data.

Regardless of the quality, it’s exciting that it can be ran locally with old techs.

Showing 4 of 14 posts